Track Volunteer Contacts
The Contacts tab is one of the nine tabs that make up a volunteer record. The tab is used to track information for contact records for volunteers. Each volunteer record can have up to 20 different contact records and each contact will appear in a separate box with fields for tracking the contact's name, phone numbers, email address, etc.
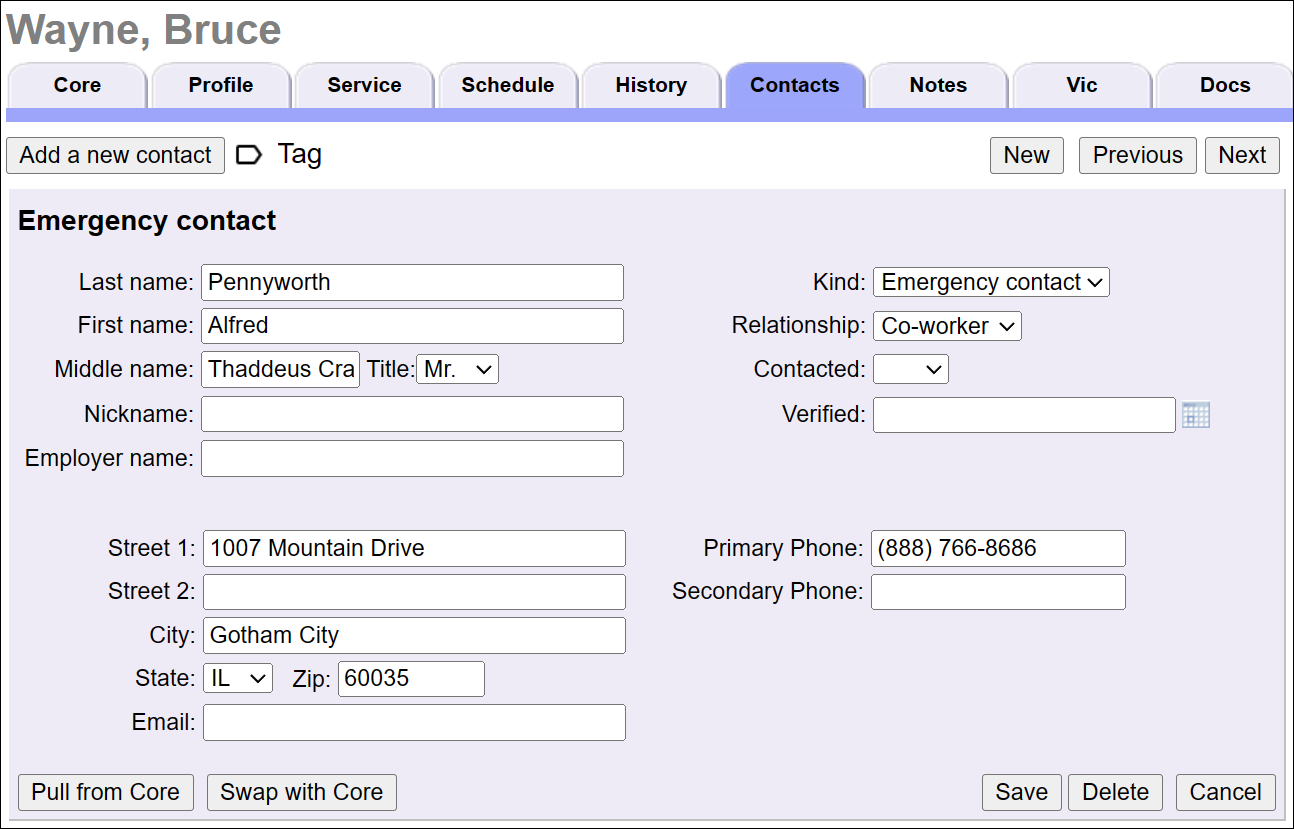
The Kind field in the contact box shows what type of contact record is stored in the box. Trial accounts come with four kinds of contacts by default:
- Emergency contact
- Employer
- Reference
- Relative
You can customize the options in the Kind dropdown to add or remove types of contacts. Here's some examples of how new options could be used:
- A hospital may want to add a Therapy Dog option to track information about a volunteer's therapy animal(s)
- A food bank with groups that serve may want to add a Secondary Group Contact to track information about other group leaders
- An organization in the northern states may want to add an Alternate Address option to track an alternate address for snowbirds
- An organization that uses interns may want to add an Advisor option to track the intern's college advisor
- An organization that has volunteers who must complete a certain number of mandatory community service hours may make a contact to track the probation officer or other individual the volunteer reports to
- An animal shelter that uses volunteers to foster animals may make a contact type to track other animals or individuals in the home
See the Add or Update Kinds of Contacts section below for information on how to add new kinds of contacts.
Add a Contact to a Record
As a System Operator, you can add a new contact to a volunteer record by:
- Choose Volunteers from the menu.
- Locate and click the volunteer's record
- Select the Contacts tab.
- Click the Add a new contact button in the top left corner. This opens a blank box for the contact's information.
- Use the Kind dropdown to select the type of contact record you're adding.
- Enter the information you want to track for the contact. For example, you can enter just a name and phone number, or you can also record a complete address.
- You can optionally record how the contact is related to the volunteer using the Relationship field. See the bottom of the Add or Update Kinds of Contacts section below to update the options shown.
- Click the Save button.
Repeat these steps if you'd like to add more than one contact for the type of contact you're adding.
Contact Fields on Applications and in VicNet
Your volunteer application forms can be set up so applicants can enter up to four contacts on their application. The applicant's contact information will appear on the Contacts tab once you receive their application.
If your account's service level includes the VicNet portal, you can allow your current volunteers to review, update, or add new contacts. Your Coordinators who oversee Assignments can also use the contact information in the VicNet portal.
Multiple Contacts on Applications and in VicNet
When you use contact fields on application forms and in the VicNet portal, you can select to have up to four of each type of contact. To save vertical space, the contacts will be stacked in tabs and the name of the contacts will show at the top of each tab. To enter or review information for another contact, the user will need to click on the other tab.
Here's an example of how this looks on an application form where the applicant is asked for two reference contacts:
Add or Update Kinds of Contacts
You can add or update what types of contact records are available in your account. To make this change:
- Choose Setup from the menu.
- Go to Field Options.
- Select Contacts Tab.
- Select Kind.
- Use the settings to add new contact types, merge two contact types together, or delete a type altogether. If you need help, see Manage a Dropdown List.
- Click the Save button.
Tip!
If you add a new kind of contact, the options in the Relationship field may need to be updated also. For example, if you add a new Advisor kind of contact, you may want to add Professor or Counselor as a relationship choice. Similarly, you may want to add new fields to collect information related to the new type of contact you're adding such as adding a Dog Breed field if you customize a contact for Therapy Dogs.
There are several spare fields available on the Contacts tab that you can customize for this, or you can repurpose an unused field such as Street 3 or Fax if you run out of spare fields. Keep in mind that the changes will appear wherever contact fields are used even if they do not apply. For example, adding a new Relationship option for Professor will make that option show when applicants submit emergency contact information, and adding a new spare field for Dog Breed will make that field show on all other contact types on the volunteer's Contacts tab.
To make changes to the fields on the Contacts tab, just follow steps 1-3 above to get to the tab's set up page and then pick the field you want to add or update. See Field Customization and Configuration if you need help.
Pull or Swap with Core
Each contact box has Pull from Core and Swap with Core buttons.
The Pull from Core button allows you to quickly pull the address and phone number information recorded on the Core tab of the volunteer record into the same fields for the contact. For example, if you're adding an emergency contact for a volunteer's spouse, you could pull in the address information without needing to copy and paste it. If phone numbers are different, you could make changes before saving the contact.
The Swap with Core button is used to flip flop the address and phone information from the Core tab to the contact record. This would primarily be used for college students where you want to quickly update the school and home address, or snowbirds where you want to update the summer and winter addresses.
Nothing Happens!
If nothing happens when you click Pull from Core or Swap with Core, you may have asked your browser to stop displaying alert dialogs. When the dialog isn't displayed, you can't provide a positive response, and Volgistics won't be able to complete the action. Fortunately, this choice only remains in effect for the current browsing session, so you can reset it by simply closing your browser and re-opening it.