Tagging Records
A tag is a temporary way to mark a volunteer record (or a group of records) so you can work with the record(s). This help topic explains the different ways that you can tag records. You can learn more about the tags feature itself in the Tags Overview help topic.
Helpful Hints for Working with Tags
- Tags are a temporary way to mark records so they only stay in place during your current session or until they are cleared.
- Each System Operator only sees her or his tagged records. If other operators for your account are logged in at the same time as you, you will not see their tags--and vice versa.
- There is not a way for Multi-Site Level Operators to carry information for tagged records to a new Site when they switch from Site to Site. Even if a volunteer record is associated with two or more Sites the operator has access to, a record tagged for a Multi-Site Level operator's first Site will not be tagged when the operator switches to the next Site.
- Tags are cumulative for your session unless they are cleared. For example, if you tag 8 records and perform a task, and then tag 5 more records without clearing your tags, the next task you perform with tags will affect 13 records.
- You can clear tags by clicking the Tag icon on individual records, or you can clear all tags at once by selecting Tags from the menu and clicking the Clear all tags button.
Tagging single volunteer records
To tag (or un-tag) a single record:
- Locate the volunteer you want to tag (or un-tag). You can learn more about how to locate the record you need in the Finding Records help topic.
- Click the Tag icon (click the icon again to remove a tag).
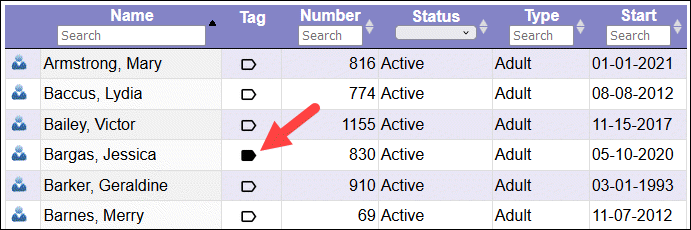
If you're looking at the alphabetical list of volunteers, the icon appears in the Tag column next to the volunteer names:
If you're inside a volunteer's record, the Tag icon is located near the top of the page:
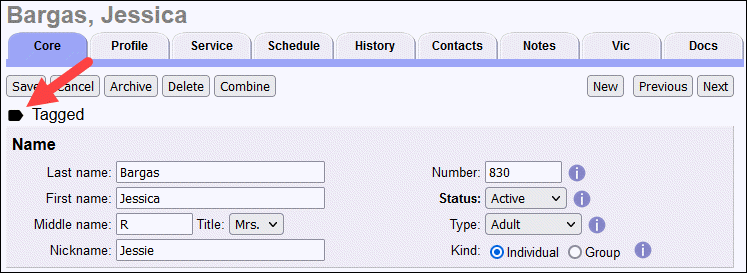
A record is tagged if the icon is filled. You do not need to save a volunteer record to make a tag "stick."
Tagging a group of volunteer records
There are various ways to bring up a list of volunteer records. For example, you can bring up groups of records on the Volunteers page using one of the methods shown in the Finding Records help topic. Or you can bring up a list of volunteers for an assignment as shown in the View Volunteers for an Assignment help topic.
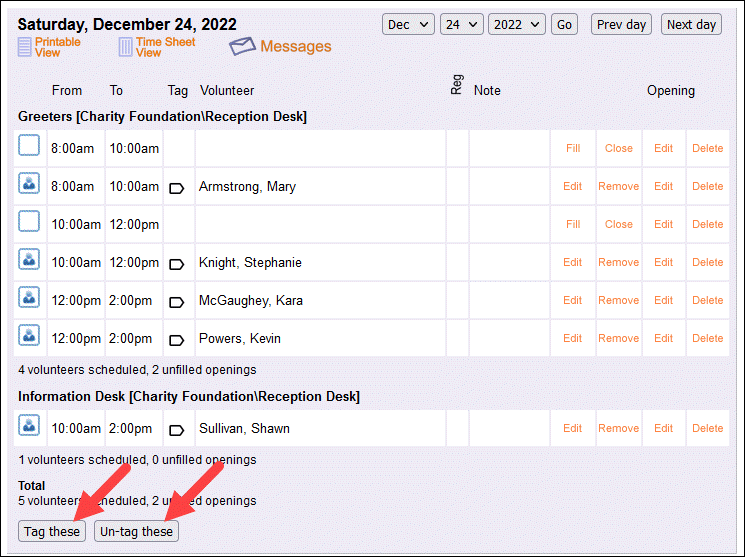
Regardless of how the list of volunteers was created, in most cases there will be an option to tag (or un-tag) all of the records on the page at once. Most of the time this will be done with the Tag these or Un-tag these buttons. Here is how these buttons look on the daily view of your master schedule:
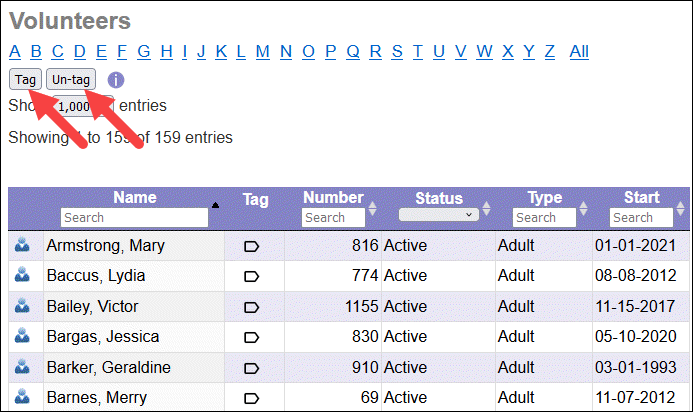
On the Volunteers page, the Tag these and Un-tag these buttons are simply called Tag and Un-tag as shown below:
Progressively adding tags
There may be times when you need to identify all of the volunteers who have any one of several different items. You can do this using tags. Here's an example:
An organization has a series of volunteer teams identified by color. For instance, they have a Red team, Green team, Blue team, and so forth. Each volunteer's team designation is recorded on their Core tab with a Flag.
Today the organization needs to send an email message to all of the volunteers who serve on any of the Yellow, Orange, or Red teams. There's an easy way, using tags.
Start by clearing any tags that may have already been set:
- Choose Tags from the menu.
- Click the Clear all tags button.
Next, tag all of the volunteers on the Yellow team:
- Choose Volunteers from the menu.
- Under Include, use the Flag dropdown to select Yellow team.
- Click the All link near the top of the page.
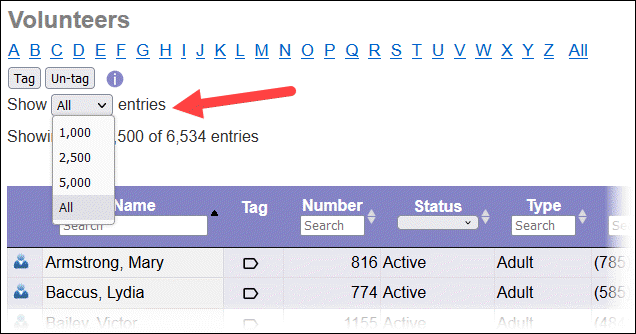
-
If necessary, select All from the Show XXXX entries dropdown so that all Yellow team volunteers are listed.
-
Click the Tag button located in the upper left corner.
Now you have all of the Yellow team volunteers tagged. Next you tag all of the Orange team volunteers by following the same steps with the exception of selecting the Orange team Flag in step 2. Note that if an individual volunteer serves on both the Yellow team and the Orange team, their record is only tagged once.
Finally, follow the same steps except select the Red team Flag in step 2. When you're finished, you will have all of the Yellow, Orange, and Red team volunteers tagged. Now you're ready to send your email to all your tagged records as shown in the Send a Message to All of the Tagged Volunteers help topic.