Tag Functionality
Once you've tagged one or more volunteer records, there are a variety of useful things you can do for the entire group of tagged records. Please keep in mind that tags are cumulative for your session unless they are cleared. For example, if you tag 8 records and perform a task, and then tag 5 more records without clearing your tags, the next task you perform for tagged records will be made on 13 records. See the Clear Tags section of this help topic for information on how to clear tags between tasks.
This help topic is broken up into sections for each kind of task you can perform.
View the tagged volunteers
You can view a list of the volunteer records that are currently tagged (or un-tagged).
- From the menu, choose Volunteers.
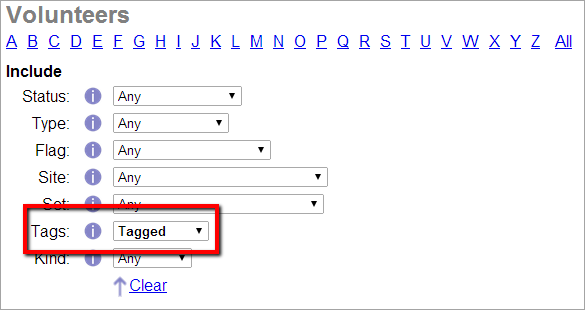
- Under the Include section, click the Clear link to clear any previous include settings.
-
Under the Include section, select Tagged from the Tags field (or Not tagged to see the list of un-tagged volunteers).
-
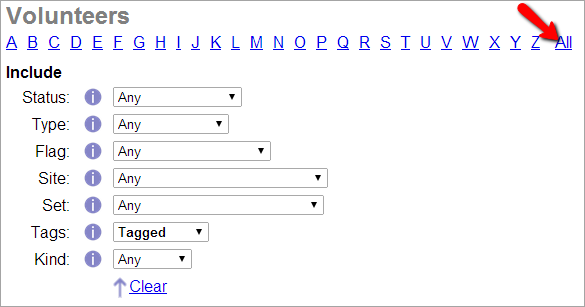
Click the All link near the top of the Volunteers page. Volgistics displays a list of all the volunteers whose records are currently tagged (or un-tagged if you chose to include un-tagged volunteers).
Run a report for the tagged volunteers
Most reports provide a way for you to include just the tagged records. For example, you can tag a group of volunteers and then create mailing labels for them. For more information on stock reports, see the Stock Report Overview help topic. For more information on custom reports, please see the Create Custom Reports help topic.
- From the menu, choose Reports.
- Choose the kind of report you would like to run, for example Address labels.
- Click on the name of the report you want to run.
- Click the Run It button.
-
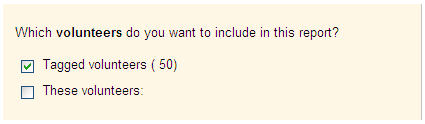
On the Include page, check Tagged volunteers and uncheck These volunteers, as shown here:
Not all reports are driven by volunteer records. Those that are not, do not offer the Tagged volunteers checkbox on the Include page.
-
Click the Run Now button.
Send email, VIC mail, or text messages to the tagged volunteers
It's easy to send an email, VIC mail, or text message to a group of tagged volunteers.
- From the menu, choose Mailbox.
- Select the Out Box tab, and then click the Send a message button.
-
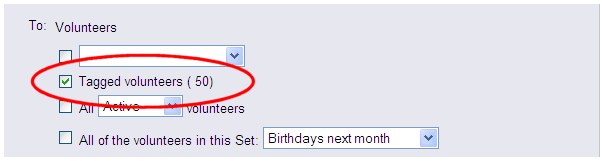
In the To section, check Tagged volunteers.
-
Compose and then send your message.
Post service information to the tagged volunteers
You can add service information such as hours, shifts worked, and more to a group of tagged records all at once from the Post page.
- From the menu, choose Post.
- If you see an introductory page, click the Continue button at the bottom to advance to the next page.
- Select to post hours for the Tagged volunteers.
- Select the options for the service you'd like to post until you're finished. If you need assistance, the Enter Service From Post Page help topic explains more.
Change the Status for all of the tagged records
To change the volunteer Status for multiple volunteers at one time, take these steps:
- From the menu, choose Tags.
- Next to Change the Status of all tagged volunteer records to, select the Status you would like to switch your tagged volunteers to from the dropdown list.
- Click the Go button.
Caution!
Your account may have some Statuses set to remove the volunteer's schedule. If the Status you selected could remove the schedule, you will see see a warning like this one:
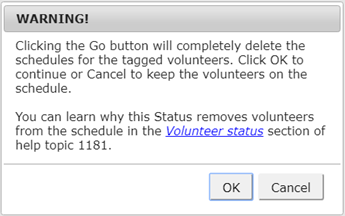
Clicking OK here will completely remove the past and future schedules for every one of the tagged volunteers. You can learn more in the Volunteer status section of the Schedule Settings help topic.
Add a Type or Flag entry to the tagged records
There may be occasions when you want to add the same Type or Flag entry to a lot of volunteer records. You can add these all at once using tags.
If the Type or Flag entry you want to make does not already appear as a Type or Flag option on the Core tab, you should start by creating it as shown in the Type and Flag Field Settings help topic.
Once the Type or Flag value you want to add exists in your database, it's easy to insert it into all of the tagged records:
- From the menu, choose Tags.
-
If you want to add a Type entry to all of the tagged records, use the Change the Type of all of the tagged volunteers to field to choose the Type you want to add.
If you want to add a Flag entry to all of the tagged records, use the Add this Flag to all of the tagged records field to choose the Flag you want to add.
-
Click the Go button.
Volgistics inserts the Type or Flag entry into all of the tagged records.
Delete the tagged records
You can delete multiple volunteer records at once by using the tags feature. Because deleting a record can have a permanent impact on your volunteer recordkeeping, we recommend reading the Important Considerations Before Deleting Records section of the Delete Non-Archived Records help topic before proceeding.
Remember! Tags are cumulative for your operator session so tags must be cleared between actions with tagged records or you may accidentally delete volunteers you do not mean to.
After you have tagged the volunteer records you want to delete, follow these steps to delete the records:
- From the menu, choose Tags.
- Click the Go button located next to Delete the tagged volunteer records.
-
Because deleting records permanently removes them from the account, a confirmation box will appear where you must verify that you want to delete the records.
If your account has the VicDocs feature enabled, the confirmation box will also include an option to save or delete the documents associated with the records. If you select to save the documents, they will be available on the In Box in your mailbox for 5 days. Please note: If you do not save the documents locally during these 5 days, there will not be a way to recover them.
Operator Rights and Deleting Tagged Records
If you do not see the Delete the tagged volunteer records option on the Tags menu, your Volgistics System Operator rights do not permit you to delete volunteer records. Your System Operator rights are set by your organization's Volgistics Administrator.
Archive the tagged records
Archiving volunteer records allows you to move records for volunteers who are not actively serving to a separate section of your database. If you are not familiar with how this affects volunteer records, we recommend reviewing the Archived Versus Non-Archived Records help topic before proceeding.
If you want to archive a group of volunteer records, you can tag those volunteers and then archive all of their records at one time:
- From the menu, choose Tags.
- Click the Go button located next to Archive the tagged volunteer records.
- Because archiving volunteers will make changes such as completely removing the volunteer's schedule, a confirmation box will appear asking if you're sure you'd like to archive the volunteers. If you're positive you'd like to archive the records, click the OK button in the confirmation pop-up. If you have any doubts, click the Cancel button in the pop-up and review the information in the Archived Versus Non-Archived Records help topic.
Nothing Happens!
If nothing happens when you click the Go button, you may have asked your browser to stop displaying alert dialogs. When the dialog isn't displayed, you can't provide a positive response, and Volgistics won't be able to complete the action. Fortunately, this choice only remains in effect for the current browsing session, so you can reset it by simply closing your browser and re-opening it.
Remember! Tags are cumulative for your operator session so tags must be cleared between actions with tagged records or you may accidentally archive volunteers you do not mean to.
Operator Rights and Archiving Tagged Records
If you do not see the Archive the tagged volunteer records option on the Tags menu, your Volgistics System Operator rights do not permit you to archive volunteer records. Your System Operator rights are set by your organization's Volgistics Administrator.
Send a VicNet password link to the tagged records
If you want to provide a number of volunteers with their VicNet password at once, using tags will allow you to do so more efficiently than sending password messages from each individual volunteer's Vic tab. Volunteers who have opted-in to text messaging will receive the password by text and by email. Volunteers who have not opted-in to text messaging will only receive the password by email.
You can customize the content of the email message volunteers receive with the link. The Send a Message with Login Information section of the Get Volunteers Started with VicNet help topic has more information on how to do this.
To send all tagged volunteers a message containing a VicNet password link:
- Choose Tags from the menu.
- Click the Go button next to Send a VicNet password link to the tagged volunteers.
Set temporary VicNet passwords for all tagged volunteers
There may be times when you want to set a temporary password that volunteers use to login to VicNet for the first time. For example, if you have volunteer orientations where you will train groups of volunteers all at once, you can set the same temporary password for the entire group and tell them the temporary password. Or, you may give out packets to new volunteers where you have instructions on how to login, and you give the temporary password in the instructions. When volunteers login with the temporary password the first time, they will be prompted to select a permanent password.
To assign a temporary password to all tagged volunteers:
- Choose Tags from the menu.
- Enter the temporary password in the field located next to Set temporary VicNet passwords for all tagged volunteers. This password does not need to meet any password strength rules you have set for volunteers because volunteers are required to set a permanent password the first time they login.
- Click the Go button.
Send the text messaging opt-in email to the tagged records
If you have enabled text messaging for your account, you will see an option to send volunteers an email message asking them to opt-in to text messaging. To send this email message:
- Choose Tags from the menu.
- Click the Go button located next to Send the text message opt-in email message to the tagged volunteer records.
The system will send the default message from the Messages Ground Rules page to all of the tagged records except for the ones where the volunteer has already opted-in to text messaging. You can find more information on how to edit the default message in the Communicate that Text Messaging is Available section of the Get Started with Text Messaging help topic.
Add a Site to the tagged records
If you use Site Level Access and you have a Headquarters Operator record, you can use tags to add a Site to the Core tabs of a group of volunteers in a single step. To do this:
- From the menu, choose Tags.
- Select the name of the Site you would like to add from the dropdown list next to Add this Site to the tagged volunteer records.
- Click the Go button.
Please Note!
There is not a way for Multi-Site Level Operators to carry information for tagged records to a new Site when they switch from Site to Site. Even if a volunteer record is associated with two or more Sites the operator has access to, a record tagged for a Multi-Site Level operator's first Site will not be tagged when the operator switches to the next Site.
Insert Date records for the tagged volunteers
There may be times when you want to add the same Date record for many volunteers. For example, you might want to enter the same Training Date record for all of the volunteers who attended a particular orientation session. Start by tagging the volunteers, who attended the session, then:
- From the menu, choose Tags.
- In the Add this Date to all of the tagged volunteer records section, enter the date record information you want to add to all of the tagged records. Please note: If you're adding a Checklist date and the Checklist item recurs on an annual or periodic basis, you will need to manually calculate the next due date and enter this in the Expires field. The system will not automatically calculate and insert an expiration date when the date is added from the Tags menu.
- Click the Go button.
Volgistics inserts the Date record into all of the tagged records.
Adding Status Dates
There are two notes to keep in mind when adding Status dates to volunteers.
First, your account may have some Statuses set to remove the volunteer's schedule. If you are adding a Status date, and the Status you select in step 2 could remove the schedule, you will see see a pop-up like this one:
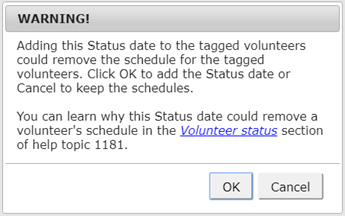
Clicking OK here will cause the past and future schedules to be completely cleared for every one of the tagged volunteers. You can learn more in the Volunteer status section of the Schedule Settings help topic.
Second, Volgistics will not add a Status date if it will give the volunteer two consecutive date entries for the same Status.
Add an Assignment to all of the tagged records
If you would like to add the same Assignment Role to the Service tab of multiple volunteers at once, you can do this using these steps:
- From the menu, choose Tags.
- In the Add this Assignment to all of the tagged volunteer records section, choose the name of the Assignment to be added from the dropdown list.
- Select the Role that tagged volunteers should be given in the chosen Assignment.
- Enter an Assignment From date and To date, if applicable.
- Click Go.
Remove an Assignment Role from all of the tagged records
If you would like to remove the same Assignment Role from the Service tab of multiple volunteers at once, you can do this using these steps:
- From the menu, choose Tags.
- In the Remove this Assignment Role from all of the tagged volunteer records section, choose the name of the Assignment you wish to remove from the dropdown list.
- Select the Role that should be removed from the tagged volunteers in the chosen Assignment.
- Click Go.
Edit an Assignment Role for all of the tagged records
If you would like to replace an Assignment Role with another for multiple volunteers at once, you can do this using these steps:
- From the menu, choose Tags.
- In the Edit this Assignment Role for all of the tagged volunteer records section, use the dropdown to choose the name of the Assignment you want to change Roles for.
- Use the Change Role dropdowns to select the Role you want to change and the Role you want to replace it.
- Click Go.
Add a Mandate to all of the tagged records
If your organization uses Volgistics' Mandatory Service features to track volunteer progress toward service goals or requirements, there might be a need to add a service mandate to numerous records at once.
- From the menu, choose Tags.
- In the Add this Mandate to all of the tagged volunteer records section, select the applicable Mandatory Service program from the dropdown list.
- Choose a Starting date for the service mandate, if applicable.
- Enter a Due by date for the service mandate, if applicable.
- Enter the number of Hours and/or Service Measures required.
- Click the Go button.
Send a schedule reminder to all of the tagged volunteers
If you use Volgistics' on-demand schedule reminders feature, you can send schedule reminders for a range of dates you specify. When you send schedule reminders through the Monthly & on-demand volunteer reminders setup page, they are sent to every volunteer who has an email address and/or text number on their record, is scheduled during the selected date range in any of the assignments for which the Schedule reminders checkbox is checked, and has not declined schedule reminder messages.
There may be a situation, however, when an organization wants to send schedule reminders only to a specific sub-group of those who would normally receive the reminders. In this case, they should take the following steps to send schedule reminders for specific dates to tagged volunteers:
- From the menu, choose Tags.
- Next to Send a schedule reminder to all of the tagged volunteers for these dates, choose the dates for which the schedule reminder should be sent.
- Click the Go button.
The message will be sent by email or text depending on if the volunteer has opted-in to text messaging and his or her message preferences.
Clear Tags
It's a good idea to clear the tags whenever you finish using them to perform a particular task. You can always clear tags from individual records by un-checking the Tags checkbox. You can also clear tags from all records at once like this:
- From the menu, choose Tags.
- Click the Clear all tags button.
If the button appears grayed out, there are not any tagged records to clear.