Volunteer Guide for VicTouch
Volunteer Guide for VicTouch
This help topic is intended to help volunteers better understand how to use VicTouch.
VicTouch is a volunteer timeclock and information center. This helps your volunteer manager keep track of the service hours you perform with their organization. You clock-in when you arrive to serve and clock-out when you've finished your service, and the VicTouch system automatically records your hours for you. You may also have access to your volunteer schedule and service history through VicTouch if your volunteer manager allows.
Let's walk through how to clock-in and clock-out and use the other features of VicTouch.
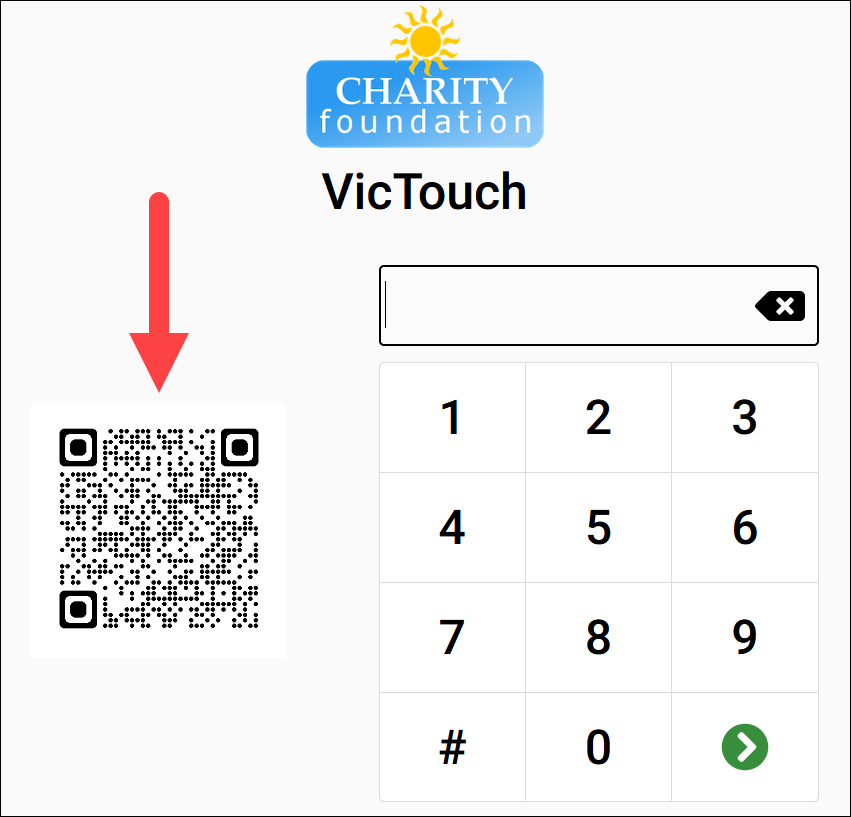
Regardless of what you'd like to do at VicTouch (sign-in for a shift, view your schedule, or review your service), you access it the same way. Enter your PIN using the number pad and select the arrow icon. If you've entered your PIN correctly, you'll be asked to confirm your identity. If you see another volunteer's name appear, this means that you've accidentally entered someone else's PIN. In this case, select the No option to return to the PIN screen and try again. You may need to reach out to your volunteer manager to make sure that you have the right PIN.
QR Code Sign-In
Your volunteer manager may prefer that you sign-in from your own smartphone rather than interacting with a device they have set up on-site. For example, hospitals, medical centers, and other health-related organizations may want to limit interactions with their devices to prevent the spread of illness among their volunteer base. To accomplish this, they may set up their VicTouch sign-in stations with a QR code that you can scan with your smartphone to bring up VicTouch on your own device. This will look something like this:
Alternatively, your volunteer manager may use a printed version of a QR code and post this in an area around where you'll be serving. This might look something like this:
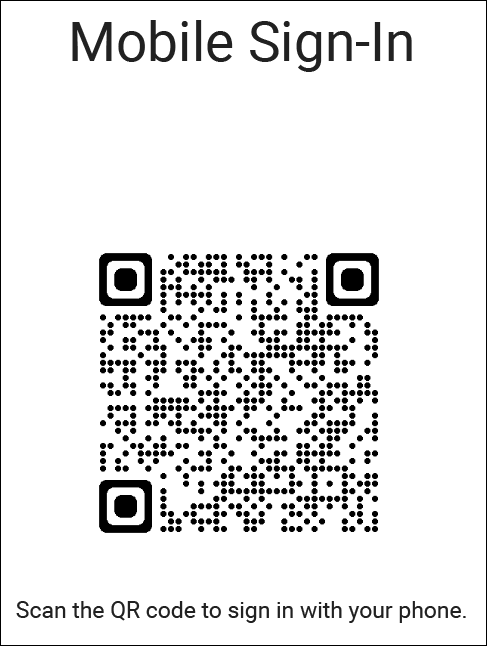
To scan the QR code, open the camera app on your smartphone and focus on the QR code image. This should bring up a link or button that you can tap to open up VicTouch in the browser on your phone. Now you can enter your PIN to sign-in like you would normally. This VicTouch session will stay open for up to 5 minutes to give you time to clock-in. When you're ready to clock-out, you'll need to scan the QR code again.
Once you have signed-in with your PIN and confirmed your identity, you'll be taken to the main VicTouch menu where you'll see several options. You can select Sign-In to clock-in for a shift or you can return to the PIN screen without taking further action by selecting Exit. Depending on whether your volunteer manager makes these options available to you, you may also see options to View Schedule and View Service. Below we'll explain how to use each of these options.
Click the heading for a section to expand it and learn more.
Sign-In
The first option and also the one that you'll likely use the most at VicTouch is the Sign-In option. This option allows you to clock-in for your volunteer shifts and have your service hours tracked automatically.
After selecting Sign-In you can choose which Assignment (volunteer job) you are performing. The list you see is generated based on criteria that your volunteer manager has set. This could list the Assignments you are scheduled for on that day or all the Assignments that you are associated with or are eligible to serve in. If you don't see the Assignment you'd like to sign-in for, you may need to talk with your volunteer manager to make sure that it is added for you.
Select the Assignment you are performing and confirm the details for your sign-in to complete the sign-in process.
For clarity, we've also broken down this process into steps here:
- Enter your PIN and confirm your identity.
- Select Sign-in. Note: If you are signing-in for a group, you'll be asked how many members of your group are serving after selecting Sign-In. Use the keypad to enter that number and select the arrow icon to proceed.
- Choose the Assignment you are performing.
- Select the Yes option to confirm your selections and start time. If you've selected the wrong Assignment or no longer wish to sign-in, select the No option instead.
- Select the OK button on the final screen of the check-in sequence to return to the PIN screen so other volunteers can sign-in.
Now you are signed-in and can start your volunteer shift!
Sign-Out
Once you are finished with your shift, you must return to the VicTouch station to sign-out. This is a very similar process to signing-in, and we've provided those steps here as well:
- Enter your PIN and confirm your identity.
- Select the Sign-out option.
-
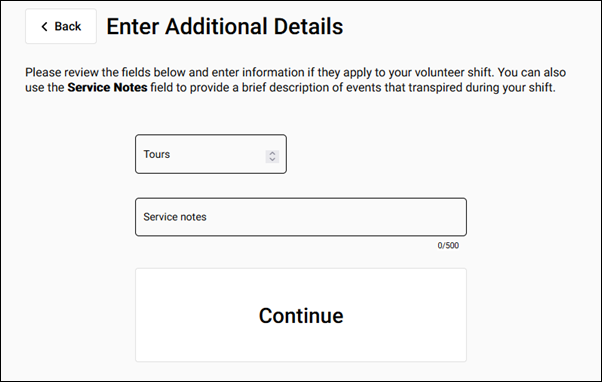
If your volunteer manager wants to collect other information about your shift, you may see another screen asking you to enter additional numerical service information or notes about your shift. Enter the applicable information and press Continue.
-
Select the OK button on the final screen to return to the PIN screen.
Now you are signed-out, and VicTouch will automatically record your volunteer hours.
Switch Assignments
The Switch Assignment option appears if you've already signed-in and haven't signed-out yet. If you're finished serving in the Assignment you originally selected and will be starting another shift in a different Assignment, you can use the Switch Assignment button to sign-out of the original Assignment and sign-in to the next Assignment in one step. To do that:
- Enter your PIN and confirm your identity.
- Select the Switch Assignment option.
- If your volunteer manager wants to collect other information about your original shift, you may see another screen asking you to enter additional numerical service information or notes about your shift. Enter any information that applies to your original shift and press Continue.
- Select the Assignment you'll be starting your next shift in.
- Select the Yes option to confirm your selection and start time. If you selected the wrong Assignment or no longer wish to switch Assignments, select No instead.
- Click the OK button on the final screen of the check-in sequence to return to the PIN screen.
Now your original shift has been completed and your hours have been recorded. You'll also be clocked in for your next shift in the new Assignment you selected.
View Schedule
Your volunteer manager may let you review your schedule and even sign-up for future shifts through VicTouch. To see your schedule, simply select View Schedule after entering your PIN and confirming your identity. Here you will see a calendar with your scheduled shifts, and if your volunteer managers allows you to sign-up for shifts, you'll also see a label on future dates showing how many openings are available on each of those days for you to sign-up. On this screen, you have a few options, and we've described each of these below:
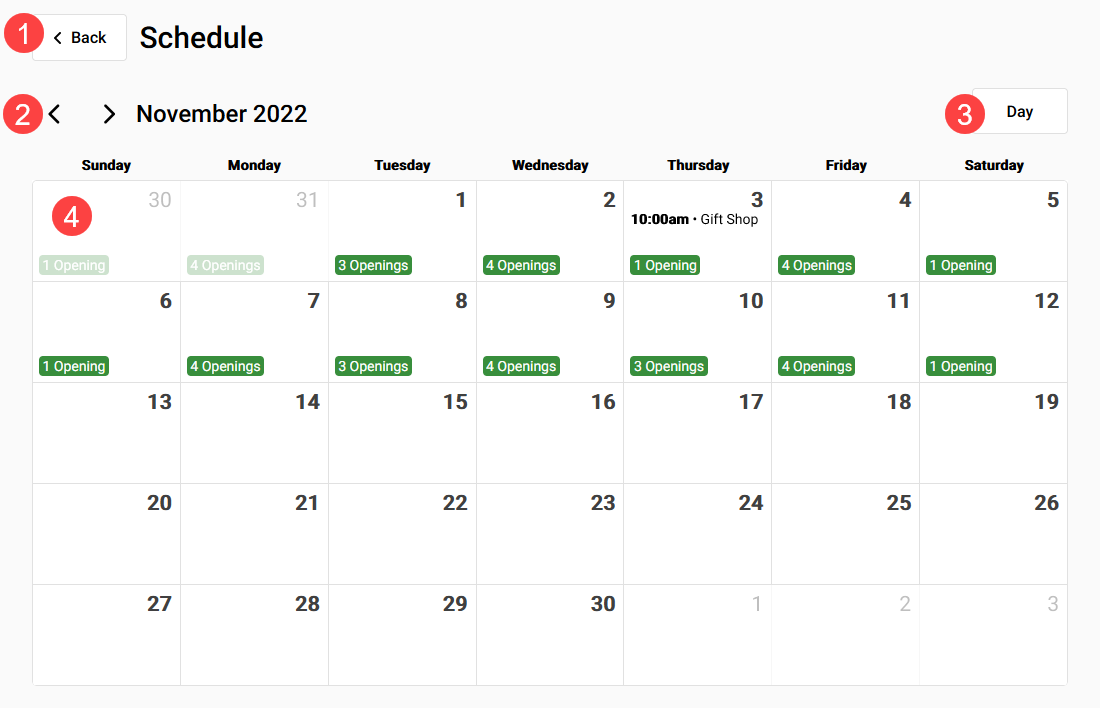
- Back Button: At any time, select this button to return to the main VicTouch menu.
- Navigation Arrows: Use these arrows to navigate to the previous or next month in the schedule.
- Day Button: Use this button to open the Day view of the current date's schedule.
- Calendar: Select any date in the calendar to open the Day view of the schedule for that date.
When you open the Day view of the schedule for a particular date, you'll have access to more information and options. This view shows a list of your scheduled shifts for that date, the shifts that are available for you to sign-up for, and shifts that other volunteers are signed-up for. Some of this information may not be visible to you depending on how your volunteer manager has configured the schedule. Below we've broken these down individually:
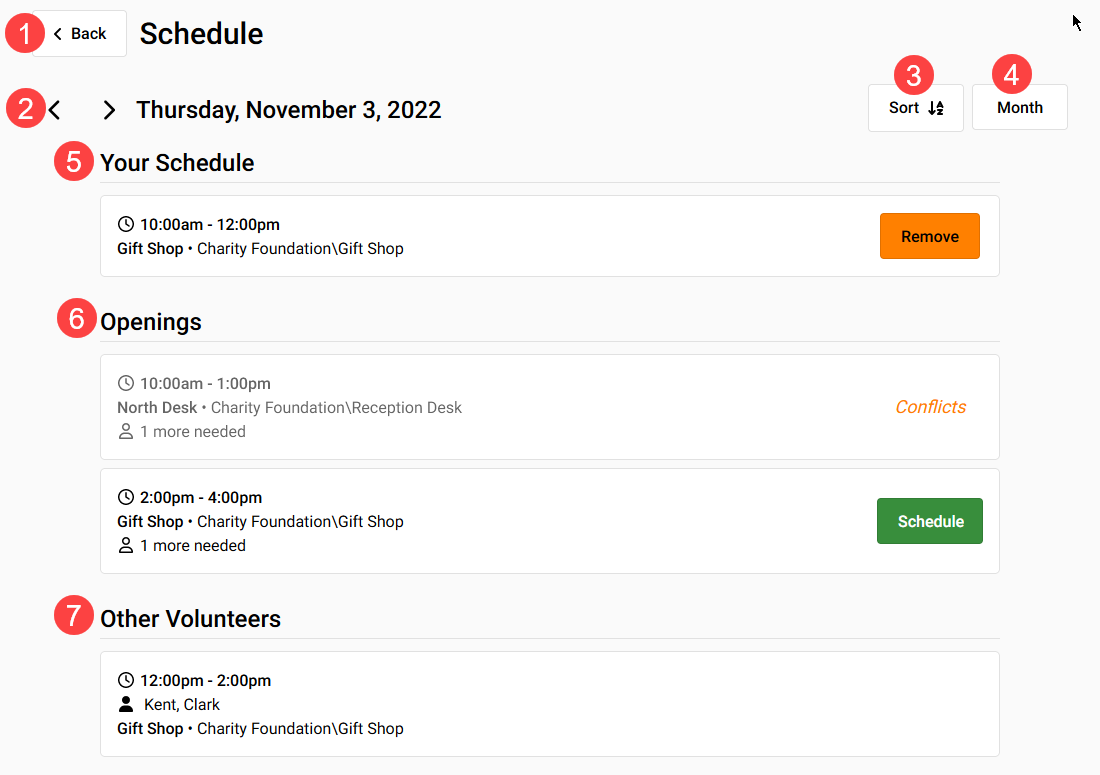
- Back Button: At any time, select this button to return to the Month view of the schedule.
- Navigation Arrows: Use these arrows to navigate to the previous or next day in the schedule.
- Sort Button: Select this button to change how the shifts are sorted. By default they will be sorted chronologically, but you can toggle to sort them alphabetically by Assignment instead.
- Month Button: Select this button to toggle back to to the Month view of the schedule.
- Your Schedule: This section shows a list of your scheduled shifts for this date. If your volunteer manager allows, you can select the Remove button to remove yourself from a scheduled shift.
- Openings: If your volunteer manager allows you to sign-up for shifts, this section will be included in the Day view. You can use the Schedule button next to a shift to fill that shift. If your volunteer manager does not allow you to schedule for overlapping shifts, any shifts that take place at the same time as one of your scheduled shifts will show a Conflicts message, and you cannot sign-up for these.
- Other Volunteers: This section shows a list of the other volunteers scheduled on this date. Your volunteer manager may not allow you to see other scheduled volunteers. In that case, you will not see this section.
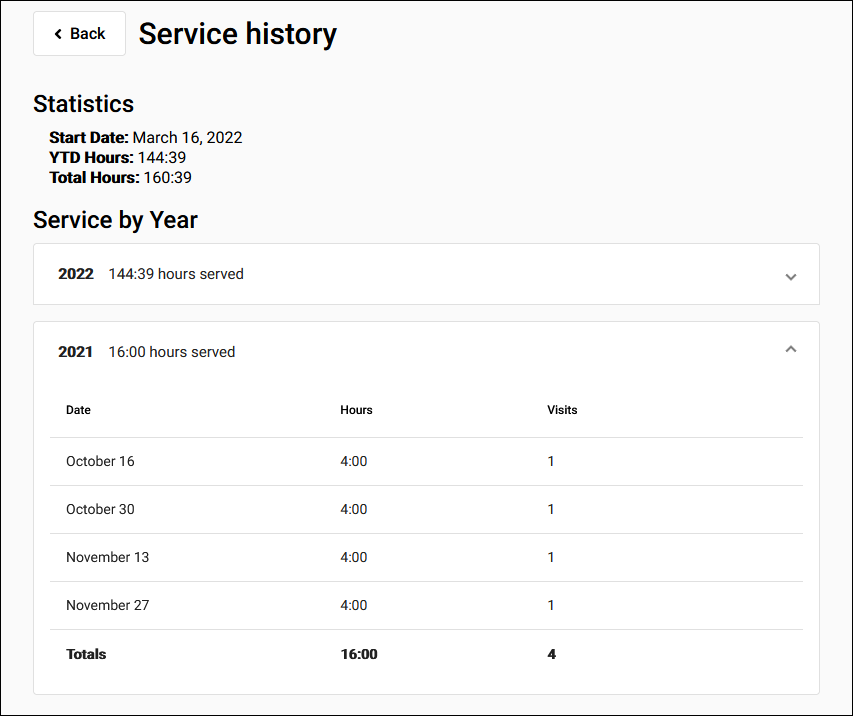
View Service
You may also have the option to view your service history when you sign-in at VicTouch. To access that information, select View Service after entering your PIN and confirming your identity. This screen can show some of your general service statistics, like the date you started volunteering, the total hours you've served with the organization, and your year-to-date (YTD) hours. You can also see a breakdown of your service by year. The yearly service breakdowns are collapsed by default, but you can select a year to expand it and see the details for each of your individual service entries in that year.