VicTouch for Event Day Sign-Ups
Volgistics is a great solution for organizations that hold special events because there are no start-up costs or contracts required. When the event is over organizers can export their data and cancel the account without any hidden fees or penalties. Annual events can even make the account dormant so they can use the same account the following year without paying fees during the months the event is not active.
The VicTouch time clock feature is a great resource for special events because it allows volunteers to clock in and out to capture volunteer service information for the event. As a bonus, organizers can even see a real-time view of who's currently serving. In most cases, organizations will receive applications to register volunteers in the weeks prior to the event and then send an email blast with instructions and include the volunteer PINs with a placeholder code.
However, there may be situations where organizations don't need volunteers to pre-register so they want volunteers to just show up on the day of the event--but they still need to keep accurate records of volunteer names and service hours. This help topic explains how to use Volgistics for this type of activity by making two QR codes that you can print and post around your event venue. Volunteers will scan the first QR code with their phones to register and then they'll scan the second code to sign in and out so their hours are recorded.
If you will not be using Volgistics as described above, we recommend using Getting Started with VicTouch instead of this help topic.
Register Volunteers
Volunteers will need a record in the account in order to clock in and out with VicTouch. You can use the application form feature to make a registration form volunteers can complete on their phones, but you'll need to set up the form to allow the volunteers to clock in right away. The Getting Started With Application Forms help topic explains how to get started with making a form.
The rest of the information in this section is recommendations and suggestions that you should keep in mind to make the system work for same day sign ups.
Status
Be sure the form is set up to give a Status (we recommend Active) that allows access to VicTouch. You do this with the Status dropdown on the main page of the application. In new trial account's any Status is set to be able to use VicTouch, but you can double check to make sure on the VicTouch Grounds Rules page.
Bypass Auditing
Volunteer records will need to go directly into your database of volunteers in order for them to clock in on the fly so be sure the Bypass auditing box is checked on the main page of the application.
Required Fields
Because volunteers will be completing the form on their cell phones, and the goal is to streamline the process, your application form should only have fields and form sections that are absolutely necessary. The fields that must be completed in order for volunteers to be able to clock in are:
- First name
- Last name
- Primary (phone)
At the minimum, the fields above should be set to Required.
You can optionally add other fields and these can be set to required also if it is essential for the applicant to submit the information. Keep in mind that each additional field will increase the amount of time needed to complete the form. Some other fields to consider are the Email field if you want to send a thank you message after your event, or emergency contact information if that should be available during the event.
If you want to be able to send text messages to volunteers during your event, you'll also need to set up your application forms so applicants can opt-in to receive texts when they apply. (Note that in order to send texts the VicNet portal will need to be included in your service level even if the portal is not used.)
Assignments and Sign-In
In Volgistics, the Assignment records represent the jobs or tasks the volunteers perform. If your event only needs to track hours--not the area where the hours were given--it is not necessary to have volunteers select an Assignment when they clock in. But if you want to be able to report on the hours given in certain areas (or jobs or tasks) during your event, the volunteers will need to choose an Assignment when they clock in.
There are two approaches to do this. One option is to have all Assignments shown when the volunteer clocks in and trust they'll select the correct one from the list. Another option is to have your application list Assignments and have the volunteers select their preferred job from the list. This option allows you to only show the Assignment(s) the volunteer selected on the application when they clock in, which will increase the chances they'll select the correct one.
Waiver and Signature
If your event requires volunteers to sign a waiver, you can collect the applicant's electronic signature right on the application form using the I Agree Section. Volgistics automatically converts completed applications into a PDF document so even if you cancel the account after your event ends you can save the completed applications as part of the data export.
Instructions in Receipt Confirmation
After your applicants apply, you'll want to provide instructions to let them know that the next step is to scan the QR code to clock in. Be sure to tell them that they'll use the last seven digits of their phone number to do this and who they should contact if they are not able to sign in. See Update Receipt Confirmation Messages for directions on how to customize your message.
QR Code for Application
The last thing for the application is to make a QR code for the form's URL address so volunteers can scan it with their cell phones at the event. You can find the URL address for your form in the Links section of the main set up page for the form. The URL Address section of Main Setup Page Settings has more information.
Once you have the URL address, there are a variety of methods to make the QR code such as Microsoft Edge or Bitly's QR Code Generator. Here's an example of a QR code made using the Edge web browser.
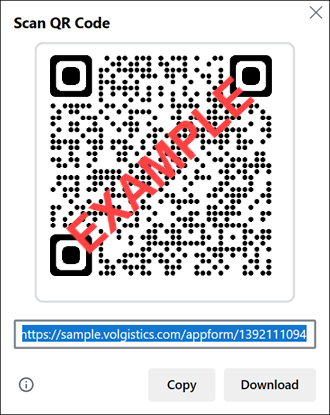
You can download the code you make to add to the sheets you'll print out and post around the venue. Because there will be two sheets, you should add STEP 1 - REGISTER (or something similar) to the top so volunteers know which code to scan first.
Clock In for Service
After the volunteers complete the application form to register, they'll have a volunteer record in your account so they'll be able to clock in for service. You'll be able to modify the VicTouch time clock for the unique way it will be used at your event. We've made some recommendations below.
Check Number Settings
If you started a new trial account, it will be set by default to use the last seven digits of the phone number recorded in the Primary phone field as the volunteer's number. This is the PIN volunteers use to clock in at VicTouch. If there is a chance the account is not set up to automatically assign the phone number, you can learn how to update the account in Automatic Volunteer Number Settings.
Check Access
If you started a new trial account, all of the Statuses are automatically selected to have access to VicTouch by default. If someone may have changed this, it's good idea to double check that the Status selected for your application form is a Status that has access. To do this:
- Select Setup on your menu.
- Go to VicTouch.
- Select Ground Rules.
- Review which Statuses are checked under Volunteer Access. Check or uncheck the boxes in front of the Statuses to fit your needs.
- Click the Save button at the bottom of the page if you make a change.
Automatic Sign Out
The system can be set up to give a certain number of hours and minutes of service if volunteers do not sign out. To set this, follow steps 1-3 above and then scroll to the bottom of the page.
If your volunteers all serve the same amount of time, you can set the page to give that amount of time so the volunteers just need to clock in and not worry about clocking out. For example, if volunteers only serve two hours at the event, set the page so 2 hours and 0 minutes are given.
If volunteers service varies and you want to keep an accurate record of hours, check the box by If a volunteer forgets to sign-out, post their service for auditing. With this setting you can adjust the volunteer time entries for volunteers who do not clock out after your event is finished.
Select Theming
You can set the VicTouch interface to use a preset color scheme or customize the colors to match your event's color scheme if it has one. If you'd like to do this, see Customize Themes for VicTouch.
PIN Screen Instructions
You should add clear instructions to the PIN screen volunteers see after scanning the QR code to launch VicTouch. Here's some things you may want to include in your instructions:
- Let them know to use the last seven digits of their phone number as their PIN
- Include information on who to contact if they are not able to clock in or forgot to clock in when they arrived
- Give a reminder to scan the QR code again at the end of their shift if you want them to clock out
You can also choose whether or not the PIN screen includes a logo for your event. When considering if you want a logo to show, keep in mind that volunteers will be using VicTouch on their phones so the logo may cause them to need to scroll down to see all the buttons. If you add a logo, you can decide whether or not to keep it after you test the registration and sign-in process.
See PIN Screen Settings for directions on customizing your PIN screen.
Select Assignment
In Volgistics, the Assignments represent the jobs, tasks, or areas where the volunteers serve. If you just want to track how long each volunteer served, you do not need to have them select an Assignment when they clock in so you can skip this part. But if you want to track the hours given for certain tasks or areas, you'll need to have the volunteers choose an Assignment when they clock in. You can set this up so volunteers choose from a list of all Assignments or just a list of Assignments they selected on the application form.
You can learn how to set this up in VicTouch Assignment Selection Settings.
Instructions After Sign In
You can update the page volunteers see after they clock in if you want them to receive instructions such as where to report. To update the page:
- Select Setup on your menu.
- Go to VicTouch.
- Select Check-In Sequence.
- Select Sign-in thank you screen setup.
- Update the instructions on the page.
- Click the Save button.
QR Code for VicTouch
After you have VicTouch set up the way you want it, you can generate a QR code to make the second sheet volunteers will scan to clock in. The Generate Printable QR Code section of VicTouch Sign-In with QR Codes shows how to do this.
You'll want to add Step 2 - Sign-In to the top of the sheet you print the code on so volunteers know they need to scan that code after they've registered. If your volunteers will need to clock out, you may want to adjust the wording to Step 2 - Sign In and Out.
Test the Process
Now it's a good idea to test the form and sign-in process to make sure things are working like you want them to. To do this, scan the first code with your phone and fill out the application form you made. Then scan the second code and go through the sign-in process using your phone.
After you fill out the form and clock-in with VicTouch, use the System Operator view of Volgistics and select Who's Here from the menu. You should see your test volunteer as being Here now. You'll be able to use this page on the day of the event to monitor who is signed in.
If your volunteers will clock out, scan the QR code again to go through the sign-out process. If you just signed in, you can edit the start time for your record from the Who's Here page before scanning the code. That way, you won't need to wait to get a realistic service entry. If your volunteers will be signed-out automatically, wait for the amount of time set for automatic sign-out. Note that the system does an hourly sweep to check for volunteers who forgot to sign out so you may not be signed out exactly after the number of hours you picked.
Once your test volunteer has clocked out, you can look at the Service tab of the test record to see the service entry.
Make Someone Available
It'll be important to have someone who's able to log in to your account available on the day of your event. This person could be located on site at the event, or they could be off site if volunteers have a way to contact them. Some options to let volunteers know who to contact are to add the information to the QR code sheets you print out, the PIN screen instructions, and the instructions shown after volunteers sign in.
If the person will be at the event, keep in mind that the part of the account System Operators use is not optimized for mobile at this time so we recommend having this person use a laptop or large screen tablet. The device will need to connect to the internet using a hot spot or something similar. Depending on the size of your event, cellular service may be slower than usual so preferably the connection method should be something that will not be impacted by large gatherings. Also for larger events, it may be helpful to have more than one person available who can log in using different credentials. Add a New System Operator shows how to make an additional set of credentials for log in.
Here are some things this person may need to assist with.
Registration or Sign In Problems
There are three common things the volunteers may need assistance with. Registration, sign in problems, or forgetting to clock in or out when they arrive or depart.
Registration Problems
If the volunteers report trouble registering for the event, most likely it is due to not scanning the correct QR code or not filling out the application correctly. For example, if the form has required fields that are not completed by the applicant, they will not be able to submit the form. In these cases, the person with access to the account can repeat the steps to test the process again to make sure things are still working as expected. Then they can advise the volunteer accordingly.
If you completed the test before, you should use different information than your original test or delete the volunteer record created from your original test before doing the second test.
Sign In Problems
If the volunteer reports problems signing in, check to see if the problem occurs when the volunteer scans the QR code or after they enter their PIN.
For problems with the QR code, check to make sure the correct QR code is being used. Again you can test the process yourself to make sure the code is working as it should.
For problems with the PIN, it could be that the volunteer's phone number was not entered correctly on the application form. Another thing that could happen is that another volunteer registered with the same phone number, but in a different area code. Because the system only uses the last seven digits of the volunteer's phone number, the volunteer who completed the application form with the same phone number will receive a random number because every volunteer must have a unique PIN. You can correct either of these by following these steps in the account:
- Select Volunteers from the menu.
- Go to the volunteer record for the person reporting the problem. If you need help with this, see Finding Records.
- Place your cursor in the Number field on the volunteer's Core tab.
- Remove the number that is currently entered and put in a new number that has not been used on another record yet. (You'll receive a message after you click Save if the number entered is in use on another record.)
- Click the Save button.
Now let the volunteer know what number you entered in step 4 and they can use that to sign in.
Account Capacity Reached
Another thing that could prevent someone who applied from signing in is if the number of volunteer records in the account reaches the capacity set by the account's service level. For example, if the service level allows for 100 volunteer records, and 100 people have applied for the event, the next applicant will not be able to sign in because their record will be sent to the Applications tab of the Volgistics Mailbox instead of into the pool of active volunteers.
In this case, the person monitoring the account during the event can increase the account's service level to add more capacity. To do this, they'll need to be an account Administrator or have the accounting access code.
Once the capacity is increased, the person monitoring the account will need to log in again and then follow these steps to receive the records for anyone who applied during the period after the account hit its record limit:
- Select Mailbox from the menu.
- Go to the Applications tab.
- Click the Check all button at the bottom of the tab.
- Click the Receive XX Checked button.
Now those volunteers will be able to clock in. Volunteers who complete the form after the capacity is increased will bypass auditing so they'll be able to clock in right away.
Forgot to Clock In or Out
If the volunteer forgot to clock in when they arrived, have them scan the QR code to clock in now if they haven't already. Then you can look at who is signed-in and click the Edit link beside their entry to adjust the time in to whenever the volunteer actually started serving. That way when they clock out they'll get full credit for the hours they served.
If the volunteer forgot to clock out, you can edit their service entry to give the correct number of hours. If you set the automatic sign out to audit hours, you can edit the entries from the Service tab of the mailbox. Otherwise, hours can be edited on the volunteer's record.
Monitor Who's Signed In
Each account has a Who's Here page that can be used to see who is currently clocked in. This can be beneficial if you need to look for a specific volunteer, quickly see how many volunteers are serving, or adjust a volunteer's arrival time. The Who's Here page can always be accessed by the person you make available the day of the event when they are logged in to the account. If you want others at the event to be able to view the page but not have access to the entire account, the Who's Here page can be set up to be shown in its own web browser window as long as a System Operator logs in to the account on the device where the page will be displayed and then launches the Who's Here page in full page view. View Who's Here has more information on how the page works.
Messaging
If you need to communicate with your volunteers during the event, the System Operator who has access to the account can send a message to your volunteers. The message can be sent by email as well as text if you had volunteers opt-in to text messaging. See Send an Email Message Overview or Send Text Messages for information on how the operator can send a message.
Message Recipients
In order to be included as a recipient of a message the volunteer's record must be in the account at the time the system sends the message. Volunteers who fill out the application form after the message was sent will not receive the message even if they meet the requirements set for message recipients. Because of this, we do not recommend sending a message to be seen on VicTouch as part of the sign-in process if you need to communicate with volunteers during the event.
Emergency Contact Information
If there is a situation where you need to contact a volunteer's emergency contact, the System Operator with access to the account can find the volunteer's record and then look on the Contacts tab for the information. Please remember that you'll need to collect the emergency contact information on your application forms to make this available.
After Event Ends
This section has information that could be useful to wrap things up after your event is completed.
Audit and Adjust Service
If you had volunteers clock out, and set your VicTouch Grounds Rules page to send service entries for volunteers who did not sign out to be audited, you should review the entries and adjust them if needed. See Audit Entries if you need help with this.
You must do this before you run service reports if you want accurate information on the reports.
Send Thank You Message
If you want to send out a message after the event to thank the volunteers or provide follow-up information, see Send an Email Message Overview or Send Text Messages.
Run Reports
You'll be able to export volunteer data to receive a complete record for all volunteers in your account, but you may also want to run service reports organized differently. For example, if you had volunteers serve in specific areas, you can run Service Summary or Service Details reports organized by the Assignment information instead of by volunteer names. Or Who Was Here Report shows how to make a custom report template to pull hours just for the date(s) of your event.
You should run all reports needed and save them locally from your In Box before canceling your account or making it dormant. After an account is canceled you will no longer be able to log in and you will not be able to run reports while the account is on Hold if you make the account dormant.
See Stock Report Overview for a complete list of stock reports available and Create Custom Reports if you'd like to make a different report.
Export Data
If you'll be canceling your account, you should export your volunteer information and documents and save them locally. The export provides a spreadsheet with all volunteer information as well as the PDF file of completed applications if you used the application to collect agreement to a waiver or liability statement. Be sure to do this before canceling the account because you will not be able to log in once the cancellation process is completed.
Cancel Account or Make Dormant
If your event is a one-time event, you can cancel your account after you've completed everything listed above. If you want to keep any receipts for the service fees, you should also save these from the Volgistics Store before canceling. Get a Receipt shows how. When you're ready, see Cancel Account for directions.
If your event is an annual event, you can make the account dormant instead of canceling so you do not need to start a new account next year. No service fees are required during the time the account is dormant. Make Account Dormant shows how to suspend the account and then activate it when needed for your event.
Related Help
- Assignments, Sites, and Places Overview
- Automatic Volunteer Number Settings
- Cancel Account
- Collect Assignment Preferences
- Customize Application Form Content
- Customize Themes for VicTouch
- Enable Text Opt-In While Applying
- Getting Started With Application Forms
- Make Account Dormant
- PIN Screen Settings
- Recommendations for Special Events
- Save Volunteer Information Locally
- Send an Email Message Overview
- Send Text Messages
- Track Volunteer Contacts
- Update Receipt Confirmation Messages
- VicTouch Assignment Selection Settings
- VicTouch Ground Rules Settings
- VicTouch Overview
- VicTouch Sign-In with QR Codes
- View Who's Here
- Who Was Here Report