Launch VicTouch with Windows Kiosk
The Windows operating system has built-in options for creating a single-app kiosk account. This is perfect for setting up VicTouch since it locks the device to a single application. This will prevent volunteers from closing out of VicTouch or navigating away from your VicTouch page. The only thing they'll be able to do on the device is access VicTouch. For this reason, this is one of the most secure methods for launching VicTouch. However, this will require you to modify the Windows settings on the device, so you'll likely need to involve your IT team with setting this up.
Microsoft provides a very detailed document explaining the different methods you can use to set up a single-app kiosk, and you can find that here: Set up a single-app kiosk on Windows 10/11.
Here we'll provide specific steps on how to set this up for VicTouch using what we feel is the easiest option provided in Microsoft's documentation.
Retrieve VicTouch URL
Before you get started, you'll need to retrieve your VicTouch URL. An Operator with access to the Setup page in your account will need to retrieve this information. To do this:
- Choose Setup from the menu in your Volgistics account.
- Expand VicTouch.
- Click Ground Rules.
-
Scroll down to the Startup section. Your VicTouch URL will be displayed in red text as shown in the example below:
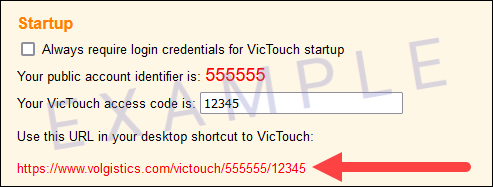
You need this URL to set up your kiosk station, so make sure to copy this down so that you can reference it later.
Create Kiosk Account
Now that you have your VicTouch URL, you can create a kiosk account on your Windows computer that only accesses VicTouch. Here are steps you can follow to set this up:
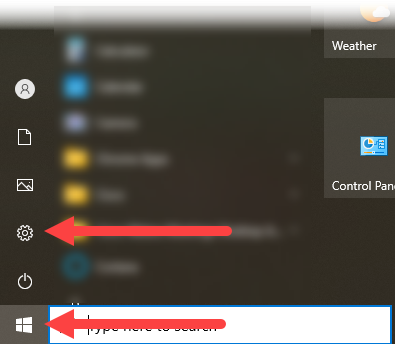
- Open the Windows Start menu.
-
Select Settings.
-
In the Settings window, select Accounts.
- On the left side of the window, choose Family & other users.
- Under Set up a kiosk, select Assigned access.
- Click Get started.
- Enter a name for the kiosk account (e.g. VicTouch or Volunteer Check-In) and click Next.
- In the Choose a kiosk app dialog, select Microsoft Edge and click Next.
- Choose the As a digital sign or interactive display option and click Next.
- Enter the VicTouch URL that you retrieved earlier and select to Never restart Microsoft Edge. Click the Next button.
- Click Close to finish the process.
You should now have a kiosk account set up on the computer that can only access VicTouch.
Launch Kiosk
All that's left to do now is launch VicTouch. To do this, you'll sign-out of your current Windows account on this device. Once you return to the Windows sign-in page, you should have the option to select the new kiosk account you created. Sign-in with that account, and VicTouch should start up automatically and volunteers can start signing-in.
If you ever need to shut down the kiosk, you can use the Ctrl + Alt + Delete keyboard shortcut to return to the Windows sign-in page.