Volunteer Guide for VicNet
Volunteer Guide for VicNet
This help topic is intended to help volunteers better understand how to use the VicNet module.
VicNet is an online portal that allows you to interact with your volunteer organization. Through this portal you can:
- Receive news and messages from your volunteer organization
- Keep your personal information up-to-date
- View and manage your schedule
- Review your service history
- Post your service hours
- Manage your email and text message preferences
This help topic provides you with a brief overview of the VicNet portal and how to use it. Keep in mind that each organization configures VicNet in the way that works best for them, so your organization's portal may look a little different and you may not have access to all of the options and features discussed here.
Logging into VicNet
There are a couple of ways to access the VicNet volunteer portal.
First, if you're using a mobile device (such as a smartphone or tablet) you can use the VicNet app to access the portal. The VicNet app is available on iOS and Android devices and can be downloaded from the App Store or on Google Play using the buttons below:

Once you've installed the app, all you need to do is open it, enter your email address and password, and select the organization you want to log in for.
Alternatively, if you're not using a mobile device or do not wish to use the app, you can access VicNet using a web browser. In this case, you have a couple options:
- You can go to www.volgistics.com/vicnet, enter your email address and password, and select the organization you want to log in for.
- You can go directly to your organization's VicNet login page. Each organization has a unique VicNet page where volunteers log in. A volunteer manager may have sent this to you, or you may be able to find it on their website. If you're not able to find the correct login page, you will need to contact a volunteer manager for assistance or use one of the options mentioned above. Once you've found the correct login page, you can access the portal by logging in with your email address and a password.
The VicNet login page should look something like this:
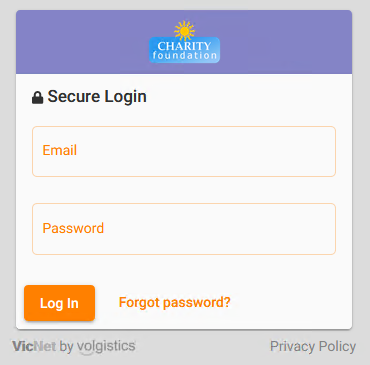
You'll use the same email address and password whether you use the app or a web browser. If your volunteer organization provided you with a temporary password, sent you a link to set your password, or you chose a password when you completed your application, use that password to log in.
If you do not have a password yet, or do not remember your password, you can set a password using the Password Reset button. To request a password reset, enter your email address and press the button. As long as the email matches the one on file, you'll receive an email with a link you can use to create a new password. If you need help, there's more information in Set a VicNet Password.
Shared Email Addresses
The VicNet portal has built-in ways of handling situations where the same email address is used on more than one record.
Same Address at One Organization
If you have two or more family members that use the same email address, or you have a volunteer record and a Coordinator record with the same email address, you can switch between records without exiting and logging back in as long as the passwords on the records match exactly and the records are in the same Volgistics account.
To switch records, just click or tap the user icon in the upper right corner and then choose to switch to the new record.
If you do not see this option, the passwords on the records do not match. In this case, use the Password Reset button to set the passwords to be exactly the same. There's additional information in Shared Email Addresses.
Same Address at Different Organizations
If you volunteer or serve as a Coordinator at different organizations that each have their own Volgistics account, you can also switch between organizations by selecting Switch Organizations from the user menu. However, there is not a way to keep an active session with both organizations so you will need to log in when you switch.
If you do not see the Switch Organizations option, it means your passwords do not match. In this case, when you use the Password Reset button you'll receive a separate password message from each organization as long as you are resetting the password on the app or the generic login page (https://www.volgistics.com/vicnet). There's more information in Switch Organizations in VicNet.
Navigating VicNet
In this section, we'll give an overview of the pages you may have access to in VicNet. Each organization can customize their portal, so you may not see all of the items that are described here. However, this should give a general idea of what you'll see and how to use each page.
If you're accessing the portal from a desktop or laptop computer, the navigation options appear as buttons along the top of the portal.

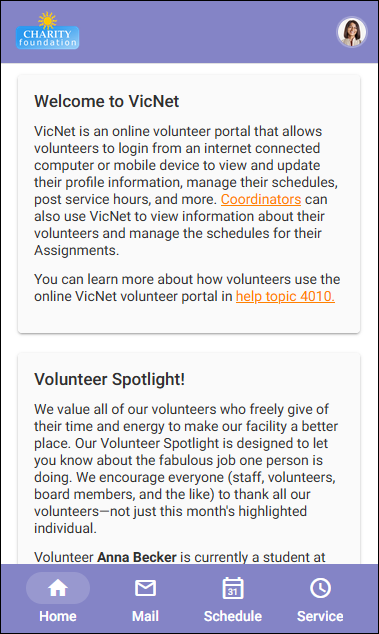
If you're accessing the portal from a mobile device, the navigation options appear along the bottom of the portal instead.
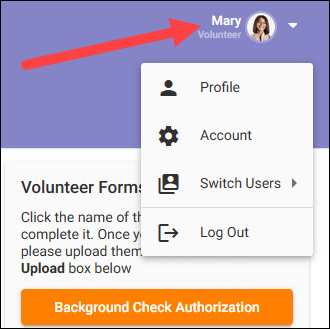
Additional options also appear in the user menu at the top right of the portal. From here you can access your Profile and Account information.
Home Page
The first page you'll see when you log in is the Home page. Your volunteer administrator may use this page to keep you up-to-date on events that are happening at their organization, provide you with access to forms or other documents, or offer other kinds of information. This page may look something like this:
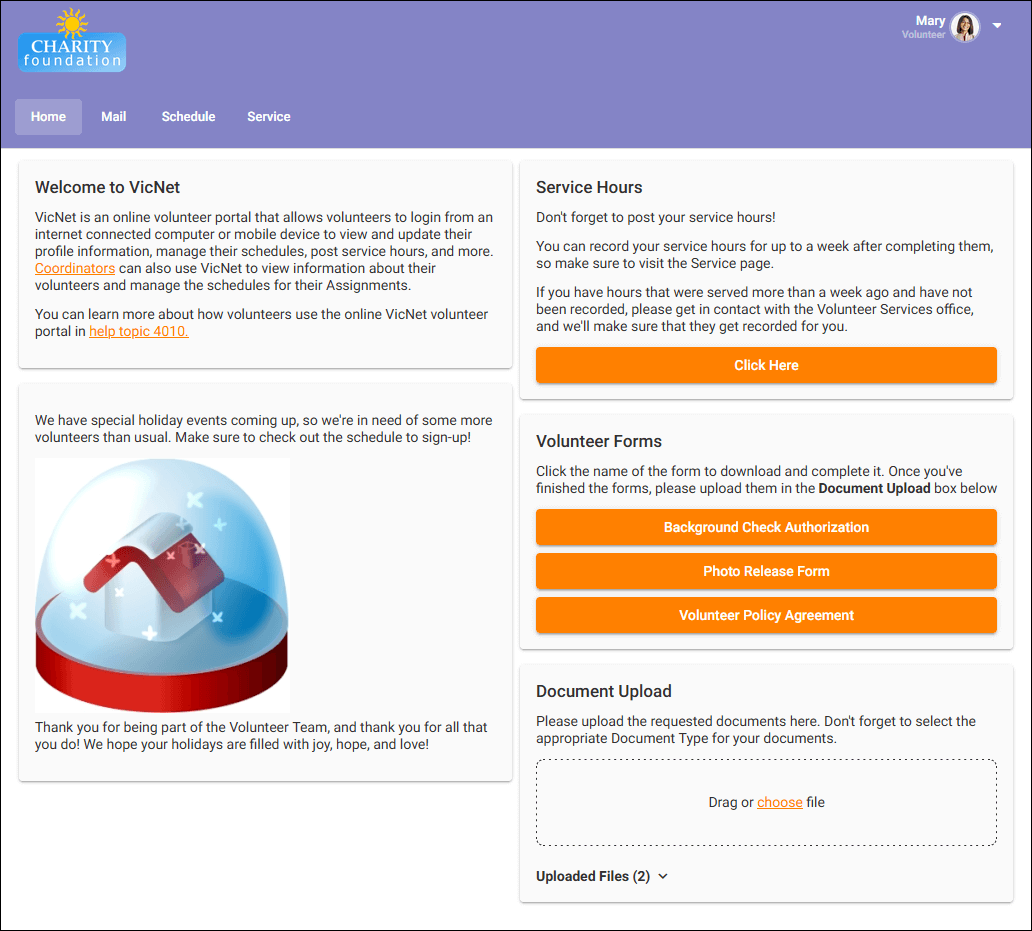
The Home page may also include a place for you to upload documents for your volunteer administrator. For example, you may need to complete a form and send it back to your volunteer organization. In these cases, you may find a Document Upload (or similarly named) section on the Home page. Here you can see the documents you've previously uploaded and have the option to upload more. This looks something like this:
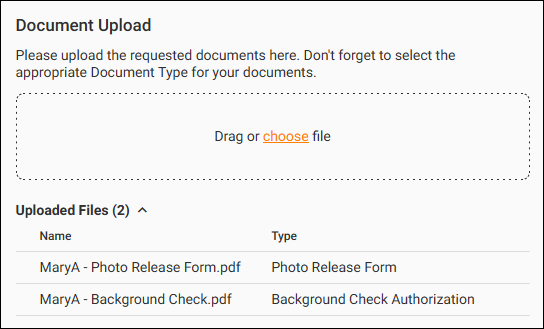
To upload a document:
- Click the area labeled Drag or choose file and select your document. OR Drag the file you wish to upload into this area.
- Use the Name field to rename the selected file if you'd like.
- Select the kind of document you're uploading in the Type dropdown.
- Click the Upload button.
Mail Page
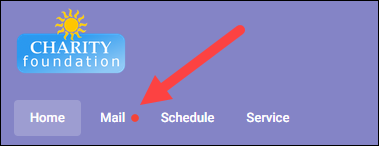
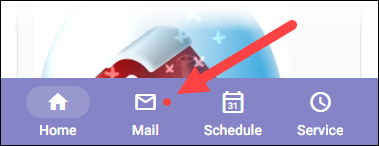
Your volunteer manager can send you messages within VicNet (called VicMail messages), and you can review these messages on the Mail page. If you have any unread VicMail messages, the Mail button shows a pulsing icon next to it:
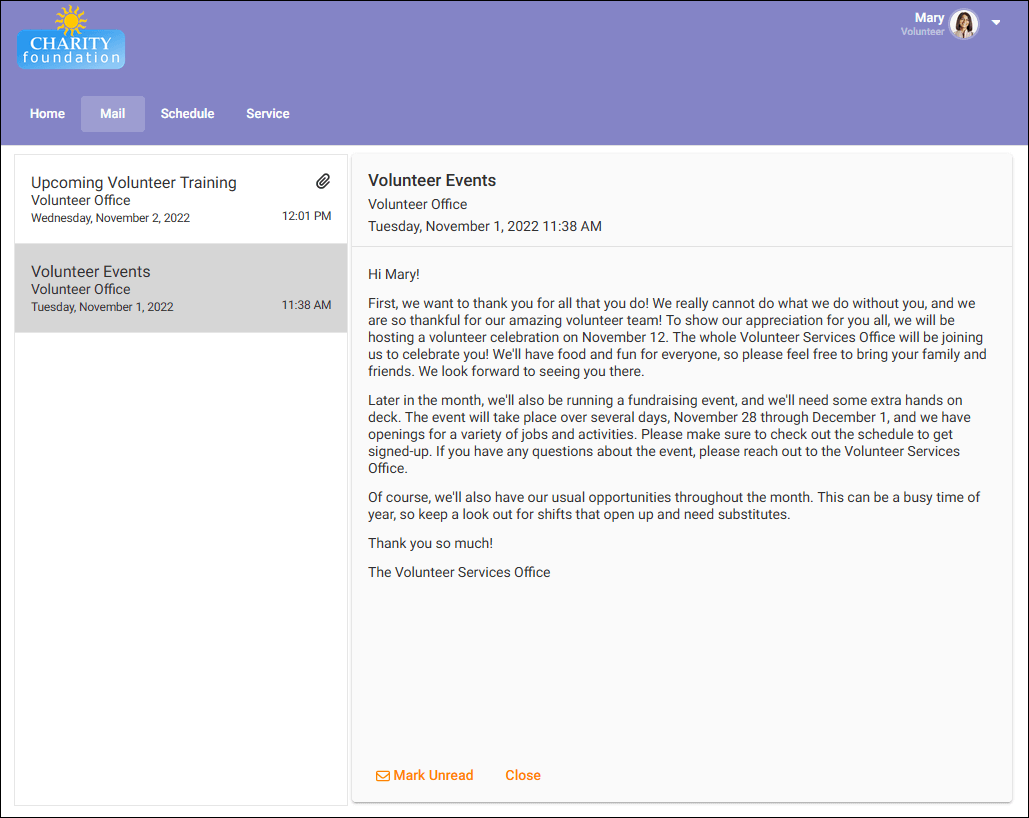
On the Mail page, you'll find a list of the VicMail messages that you've received from your volunteer manager. Unread messages appear in bold, and you can view a message by clicking on it.
Schedule Page
On the Schedule page, you can view your schedule, and if your organization allows, you can sign-up for and remove yourself from shifts. This page may look a little different depending on how your organization has decided to use the scheduling features. You may be able to view the schedule as a calendar, or you may just see a simple list of available shifts and shifts you've signed-up for. We'll provide some examples of how these look and work here.
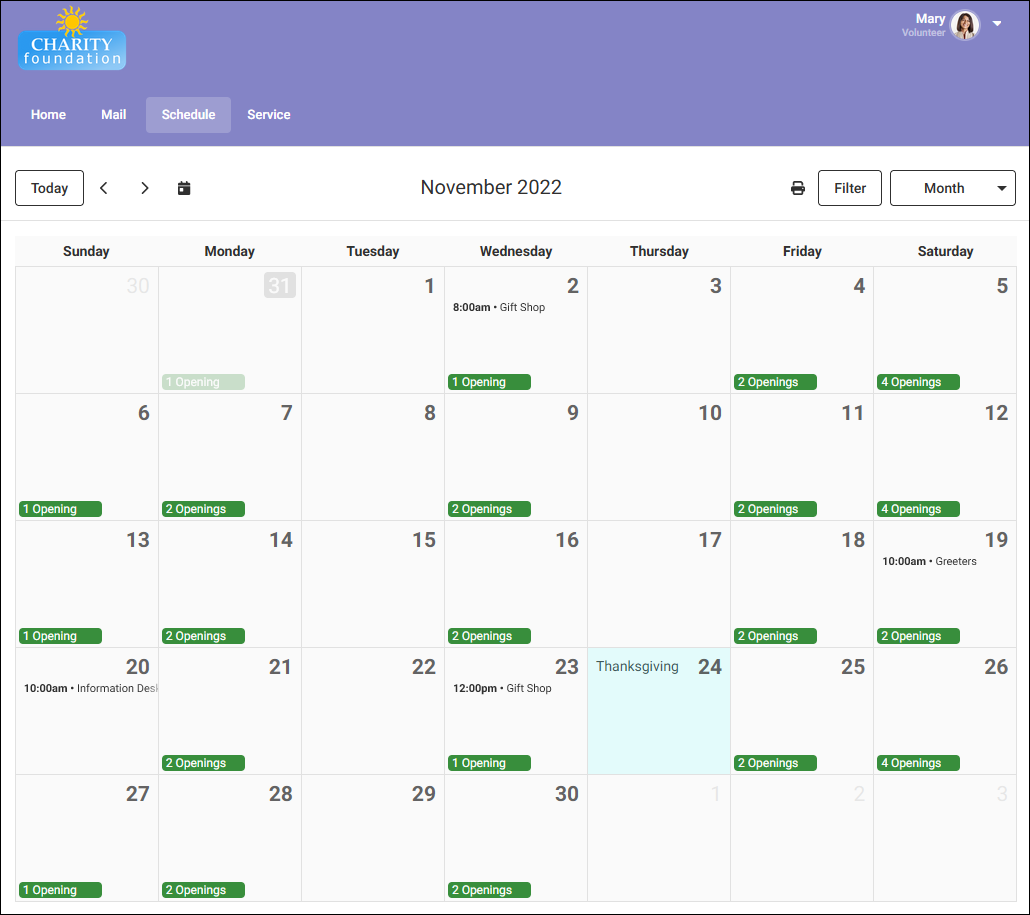
Organizations most commonly utilize the calendar view of the schedule. With this option, you have a few ways to view the schedule. Typically, you'll start off on the Month view of your schedule. This shows your scheduled shifts and indicates whether shifts are available for you to sign-up for each day (so long as your organization allows you to schedule yourself).
You can see more details about a particular date's schedule by clicking on that date in the calendar. This brings up the Day view for that specific date. From here, you can see a list of your existing scheduled shifts for that day. Then you can see a list of openings that you're eligible to sign-up for. And lastly, you can see a list of other scheduled volunteers (if your volunteer manager lets you see that information).

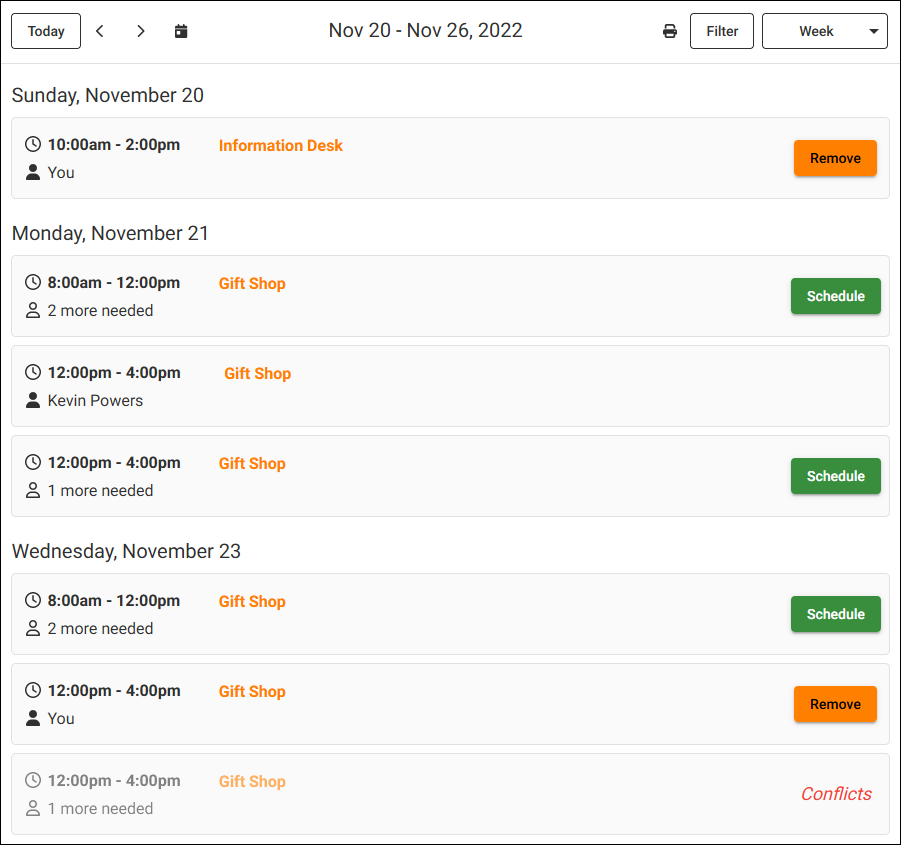
If you'd like to see schedule information for multiple days at once, you can use the Week view of the schedule. As the name suggests, this view shows a whole week of schedule information. Unlike the Day view, the Week view does not separate schedule information into different sections for each day. Instead, each day shows your scheduled shifts, open shifts, and other volunteers' shifts together in chronological order.
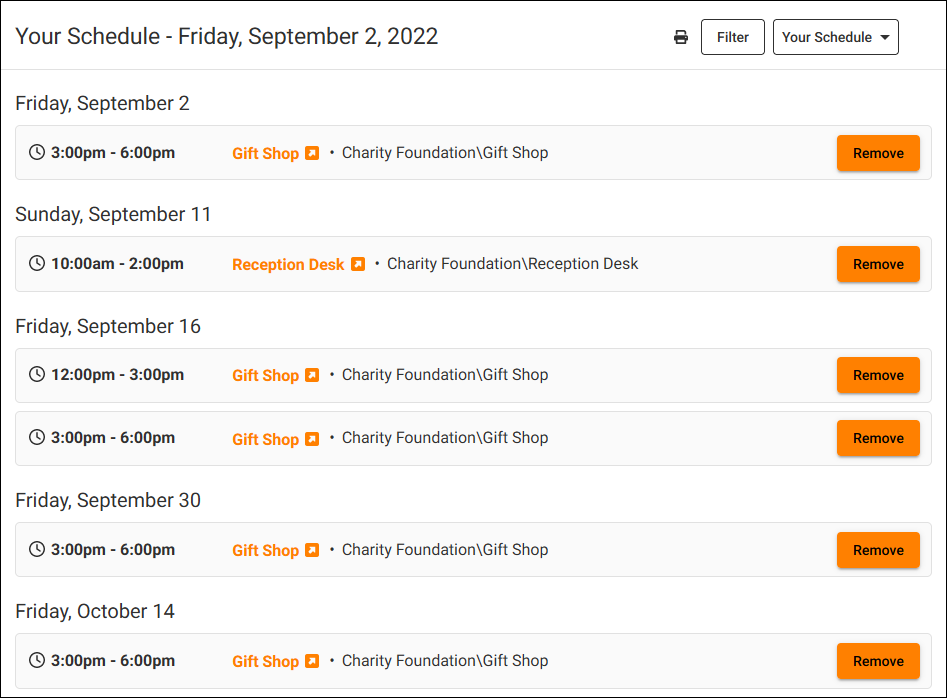
In addition to the Month, Week, and Day views, you can also get a simplified view that only shows your scheduled shifts by going to the Your Schedule view. This gives you a list of all the shifts you've already been scheduled for, and the system automatically loads more shifts as you scroll through so you can easily review your upcoming schedule. You won't be able to see or sign-up for new shifts or see other scheduled volunteers from this view though.
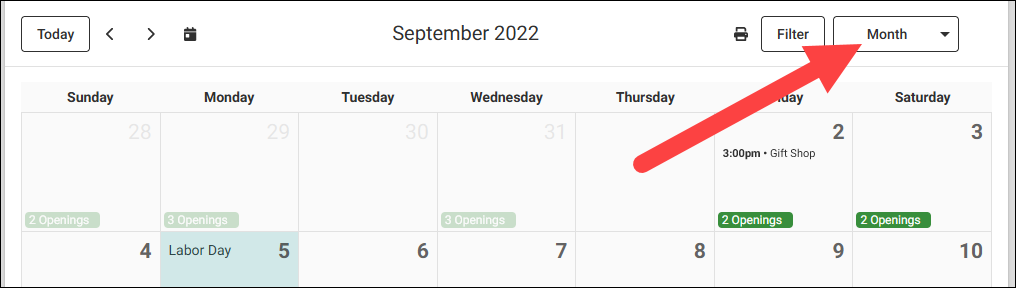
You can change your view to any of these options at any time using the dropdown at the top right corner of the Schedule page.
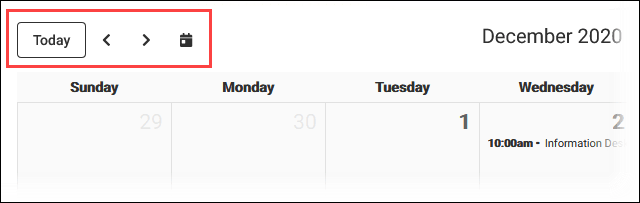
You can also navigate through different time periods in the schedule using the options that appear at the top left of the Schedule page. The Today button brings you to the current date. The left and right arrow icons allow you to navigate to the previous or next month, week, or day depending on which view of the schedule you are using. And if you'd like to navigate to a specific date, click the calendar icon next to the right arrow icon and select the date you want to view.
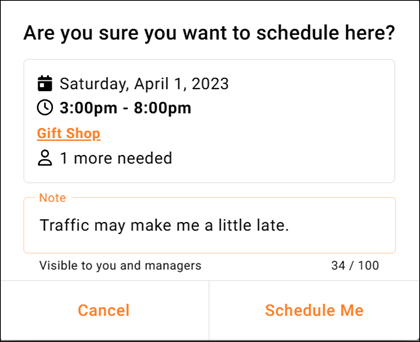
If your organization allows you to schedule yourself, you'll be able to sign-up for shifts on the Day and Week views. To do this, simply click the Schedule button next to the shift you wish to sign-up for. This brings up a box with the details for the shift, and you can add yourself to that shift by clicking the Schedule Me button.
A similar process is used to remove yourself from a shift you've already been scheduled for (if your organization allows this). Click the Remove button next to the shift you want to remove yourself from. A dialog will appear with the details of the shift and will ask whether you're sure you want to remove yourself. Click the Yes button to remove yourself, or click the No button if you'd like to stay scheduled in that shift.
Tips!
You can learn more about an Assignment by clicking the Assignment's name which appears as a link. This will take you to the Opportunity Directory listing for the Assignment. Depending on how the volunteer managers set up the listing and their account, the listing can show a description of the Assignment, additional directions, contact information, and even a map to the location.

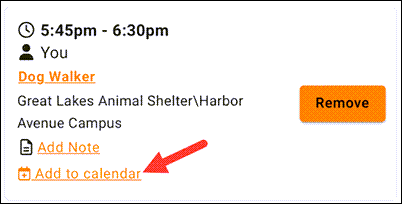
If you are using the VicNet app, there will be a link at the bottom of your scheduled shifts to add the event to your personal calendar. Just click the link to put the event into your schedule of daily events!
If your organization does not use the calendar scheduling option, the schedule is displayed as a list instead. In the list view, you can see your scheduled shifts and the shifts that are available. This looks something like this:
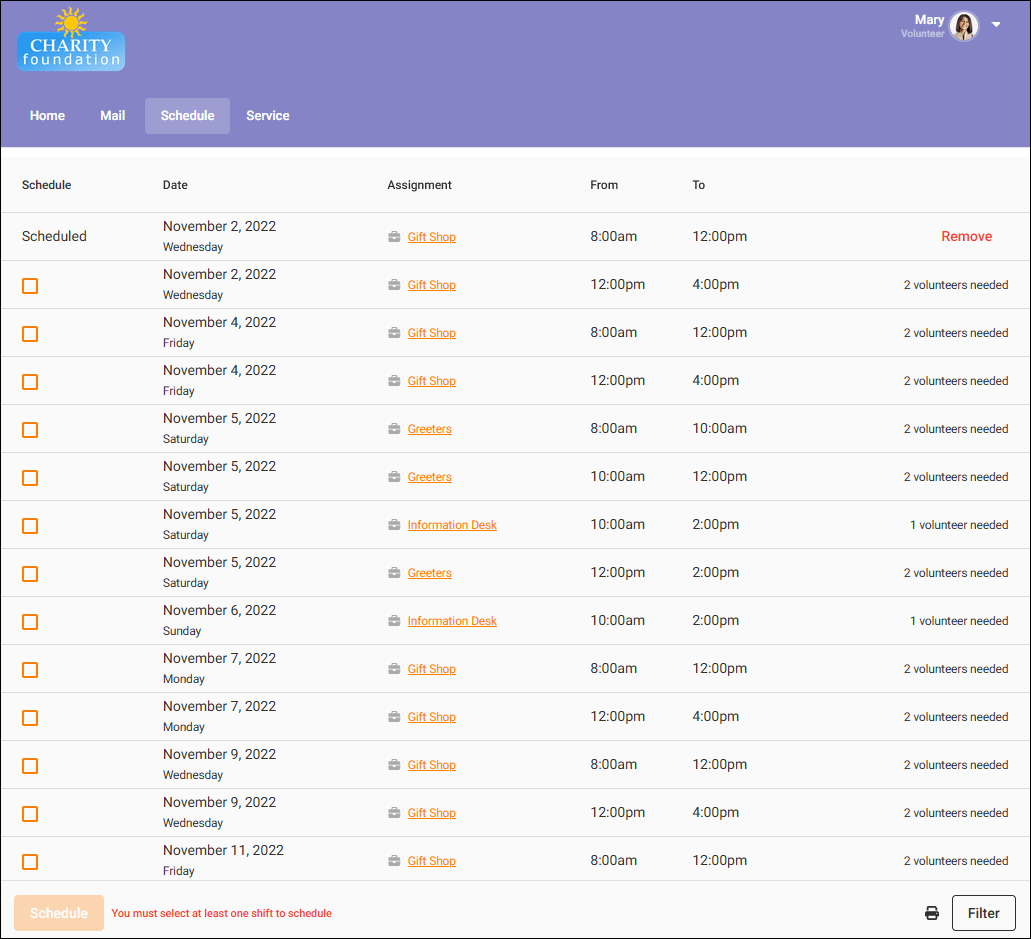
To sign-up for shifts, check the box next to each shift you'd like to be added to and then click the Schedule button at the bottom of the page. If the checkbox next to a shift is disabled, this means that it conflicts with another shift you've selected or a shift that you are already scheduled for. If your organization allows, you can remove yourself from a shift by clicking the Remove button to the right of that shift and confirming that you'd like to be removed.
In both the calendar and list views of the schedule, you can filter which shifts are visible using the Filter button. In the calendar view, it appears at the top right of the page next to the dropdown used to switch between the Month, Week, Day, and Your Schedule views. However, with certain scheduling settings, the Filter button will not be accessible on the Month view, so you may not see it there. In the list view, this button appears at the bottom right corner of the page.

With the Filter options, you can choose which Assignments you would like to view schedules for. By default, you'll see shifts for all the Assignments you can sign-up for, but the filter can help you find shifts for the specific Assignment(s) you're interested in. Once you've selected a filter, the button is highlighted and shows Filter Applied so you know that not all information is being displayed in the schedule. You can clear any filters you've set by clicking the Filter Applied button and then clicking the Reset button.
Service Page
On the Service page you can post your own service hours and review the past service you've performed with your volunteer organization. This page is broken up into four sections.
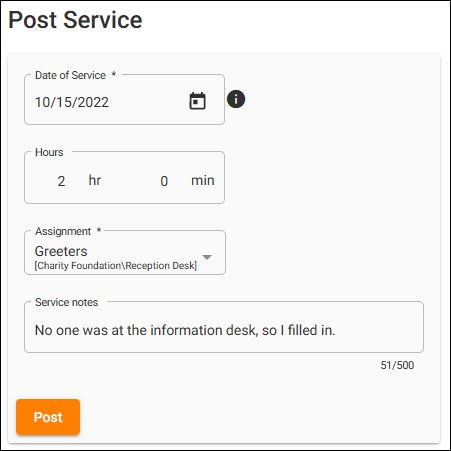
The first section is labeled Post Service. This section allows you to record your own service hours. You can indicate the date you served, the times and/or the number of hours served, the Assignment you served in, other measures related to your service, any notes you want to include, and whether this entry should apply to a service mandate.
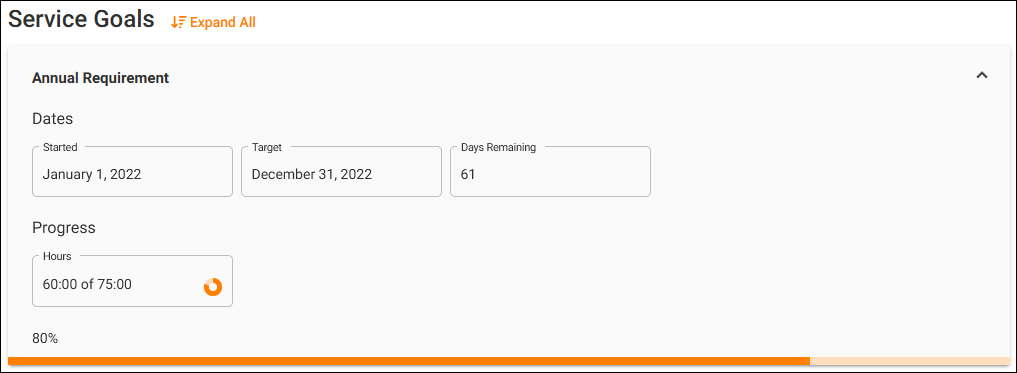
The second section is called Service Goals. This section shows any service mandates that you have been assigned and your progress toward completing them. If you do not have any assigned mandates, this section will not appear.
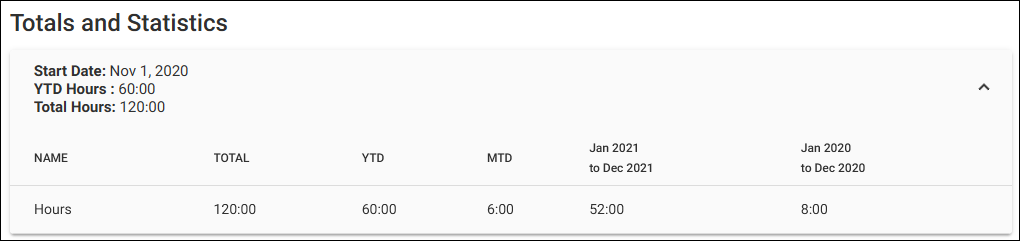
The third section, called Totals and Statistics, includes general statistics about your service with this organization. By default you'll see the date you started with this organization, your fiscal year-to-date (YTD) hours, and your total life hours. You may be able to expand this section to see additional statistics if your organization has decided to make that information available.
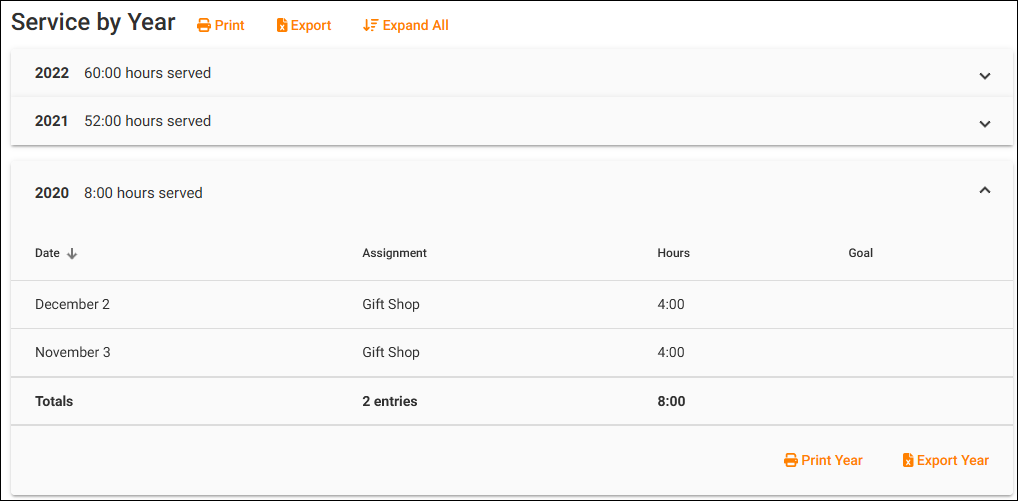
Service by Year is the last section and shows your service by calendar year. You'll see a row for each year you recorded service with the organization and the total hours served in each. You can click on each row to expand it and see a list of the individual instances of service you performed in that year. You can use the Print and Print Year buttons to generate a PDF file with your service data so you can print it. You can also use the Export and Export Year buttons to create an Excel file with your service data.
Profile Page
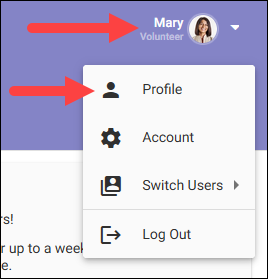
The Profile page allows you to review your personal information and update it as needed. You can access the Profile page by selecting the user menu at the top right of the portal and selecting the Profile option.
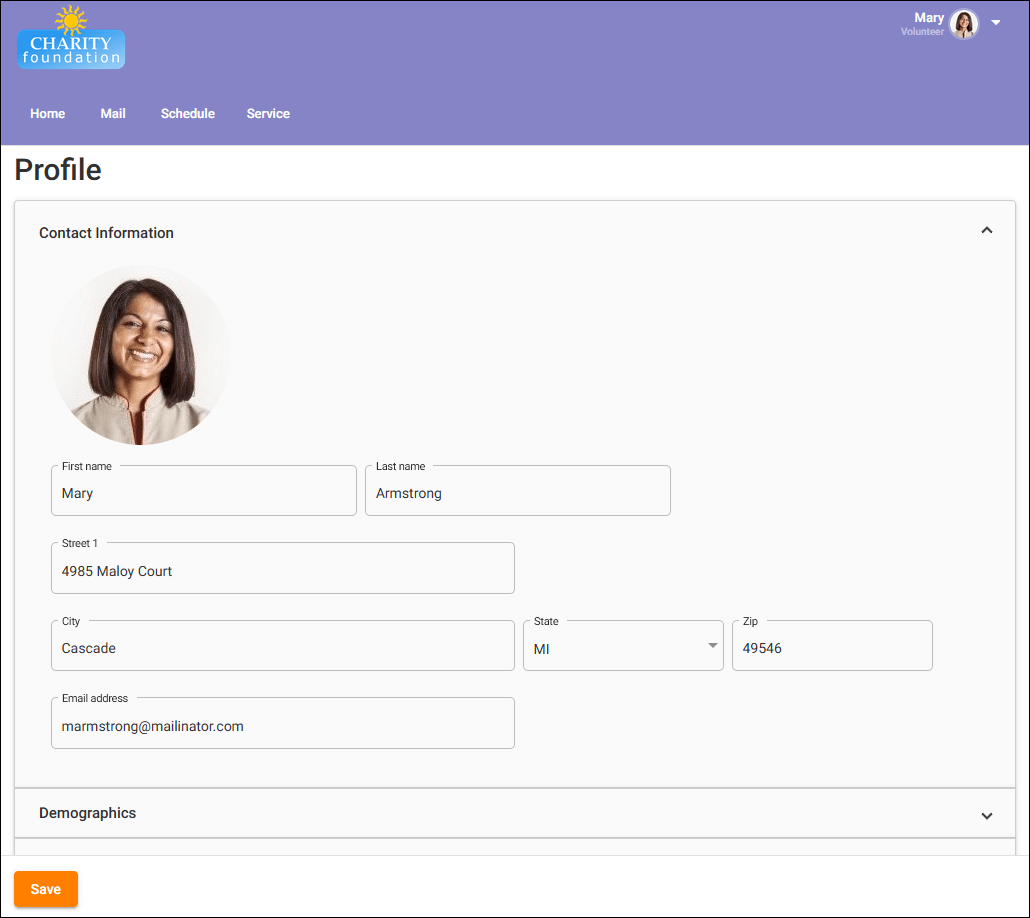
Your information is organized into collapsible sections, and you can collapse or expand those sections by clicking on the section heading. Depending on how your volunteer organization has configured the fields on this page, some fields may be required, meaning they must have information entered or selected. Other fields may be "read-only" which means that you can see them but cannot edit them. Required fields appear with an asterisk (*) next to their name, and "read-only" fields are grayed-out. If you make any changes to your Profile information, remember to click the Save button.
Account Page
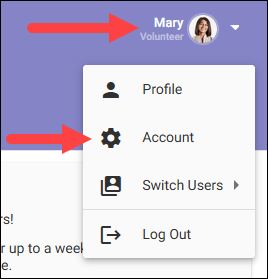
The Account page in VicNet lets you manage the password you use to access the volunteer portal and also your message preferences. Here you can change your password, and you can choose which kinds of messages you want to receive from your volunteer organization. To access the Account page, select the user menu at the top right of the portal and select the Account option.
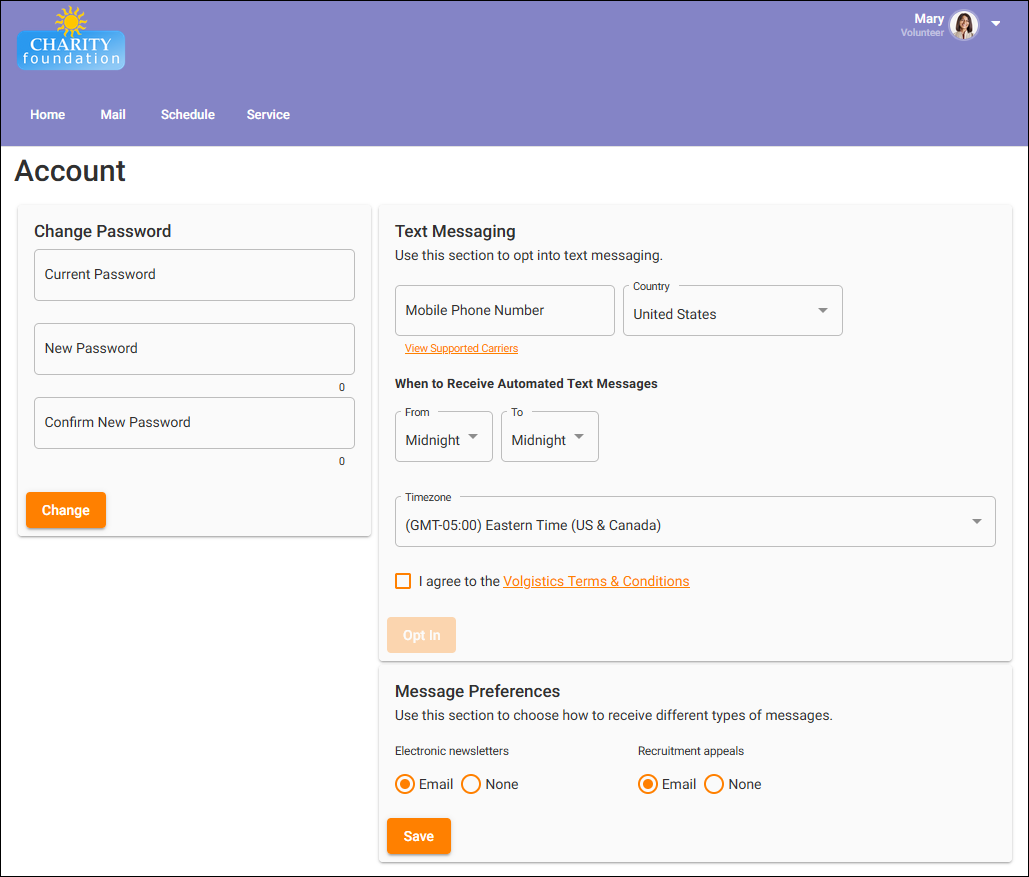
To manage your message preferences, simply select Email next to the kinds of message you wish to receive, and select None next to the kinds of messages you do not want to receive.
If the organization you volunteer with uses text messaging, you'll also have options to opt in to receive text messages from them, and once you opt in you'll be able to manage your text messaging preferences here as well. To opt in, enter your mobile phone number, indicate the times you'd like to receive automated messages (like schedule reminders) by text, select your time zone, and check the boxes next to the terms and conditions to indicate that you agree to them. Then click the Opt In button. Once you've completed this process, you'll receive a text message to confirm your opt in, and you will need to reply YES to that message to complete the process. Then the Account page will also include options for each kind of message so that you can choose to receive them by text or email.
If you are already opted in to receive text messages from your volunteer organization but no longer wish to receive messages this way, you can opt out on the Account page as well. To do this, click the Opt Out button that appears at the top of the Message Preferences section and confirm that you no longer wish to receive text messages.
Please Note
The above is designed to be an introduction into the general functionality and look of the VicNet portal. Things will likely look at least a little different for your organization. For this reason, if you have any questions about how you should be using VicNet, you should get in contact with a volunteer administrator at your organization.