Coordinator Guide for VicNet
Coordinator Guide for VicNet
This help topic is intended to help Coordinators better understand how to use the VicNet module.
VicNet is an online portal that you can use to interact with information in your organization's volunteer database. Through VicNet you can:
- Receive news and messages from volunteer administrators
- Review and edit profile information for your volunteers
- View and manage the schedules for the assignments you oversee
- Manage your email and text message preferences
This help topic will walk you through the VicNet portal and how to use it. However, keep in mind that your volunteer administrators will be able to customize the look of the portal and choose which features are available to you. So the portal may look a little different for you and you may not have access to all of the options discussed here.
Logging into VicNet
There are a couple ways to access the VicNet portal.
First, if you're using a mobile device (such as a tablet or smartphone), you can use the VicNet app to access it. The app is available on iOS and Android devices and can be downloaded from the App Store or Google Play using the buttons below:

Using the app is one of the easiest ways to access VicNet. All you need to do is open the app, enter your email address and password, and select the organization you'd like to log in for.
Alternatively, if you're not using a mobile device or do not want to use the app, you can access VicNet using a web browser. There are a couple of options to access VicNet via a web browser:
- You can go to www.volgistics.com/vicnet, enter your email address and password, and select the organization you want to log in for.
- You can go directly to your organization's VicNet login page. To do that, you would need the unique link for that page. This is something a volunteer manager may have provided to you or may be on your organization's website. If you're not sure where to find your organization's VicNet portal, you'll need to contact a volunteer administrator at your organization, and they should be able to show you where to find it. Or you can use one of the other options above.
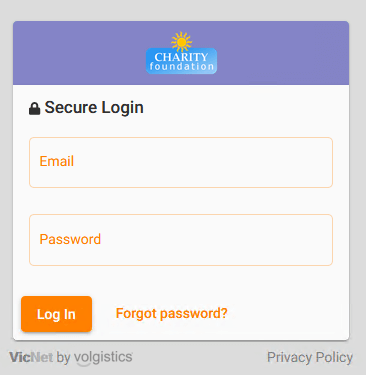
The VicNet login page will look something like this:
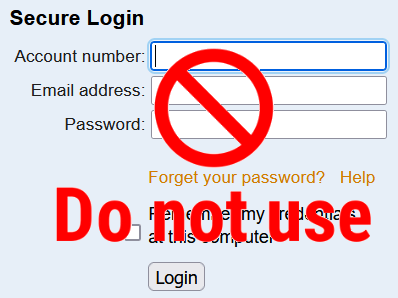
Important!
If you see a field to enter an account number on the login page you're viewing, you are at the wrong login location! Coordinators do not login at www.volgistics.com. Only the volunteer managers use the Login page at www.volgistics.com.
Regardless of whether you are using the app or a web browser, you will log in using your email address and a password. If the volunteer administrator assigned you a temporary password or they sent you a link to set your own password, you will need to use that password to log in.
If you do not have a password yet or do not remember your password, you can use the Password Reset button to set a new one. This will let you enter your email address, and so long as it matches the email address on file for you, the system will send you an email with a link you can use to create a new password. If you need help, there's more information in Set a VicNet Password.
Shared Email Addresses
If you also serve as a volunteer for this organization, you have separate volunteer and Coordinator records. Each record is handled separately. Your volunteer record is used for your volunteer profile, schedule, and service--these things are not available as a Coordinator. You can learn how to use VicNet as a volunteer in the Volunteer Guide for VicNet.
Because the records are separate from one another, the credentials to access VicNet as a Coordinator will not automatically match the credentials to access VicNet as a volunteer. You'll need to manage the credentials for each record separately. The way you use the portal varies depending on the email address and password set for the records. Setting the same password for both records provides the best experience. See Shared Email Addresses for information.
If you volunteer or serve as a Coordinator at different organizations that each have their own Volgistics account, you will also have separate records in each account and the credentials must be managed separately. Setting the same password for the records in each account provides the best experience in this case too. There's more information in Switch Organizations in VicNet.
Navigating VicNet
Here we'll walk through the different pages you may have access to in VicNet. The volunteer administrator will be able to customize which pages are visible to you and which features you can use, so you may or may not have access to all of the items described here. However, this should provide you with a general idea of what you'll see and how to use each page.
If you're accessing the portal from a desktop or laptop computer, the navigation options will appear as buttons along the top of the portal.

If you're accessing the portal from a mobile device, the navigation options will appear along the bottom of the portal instead.
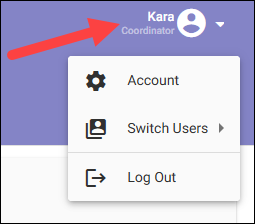
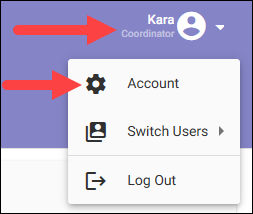
Additional options appear in the user menu at the top right of the portal. From there you can access your Account information, switch to another user that shares the same credentials, and log out.
Home Page
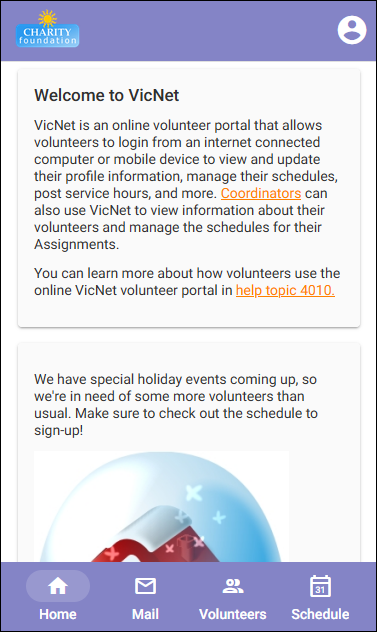
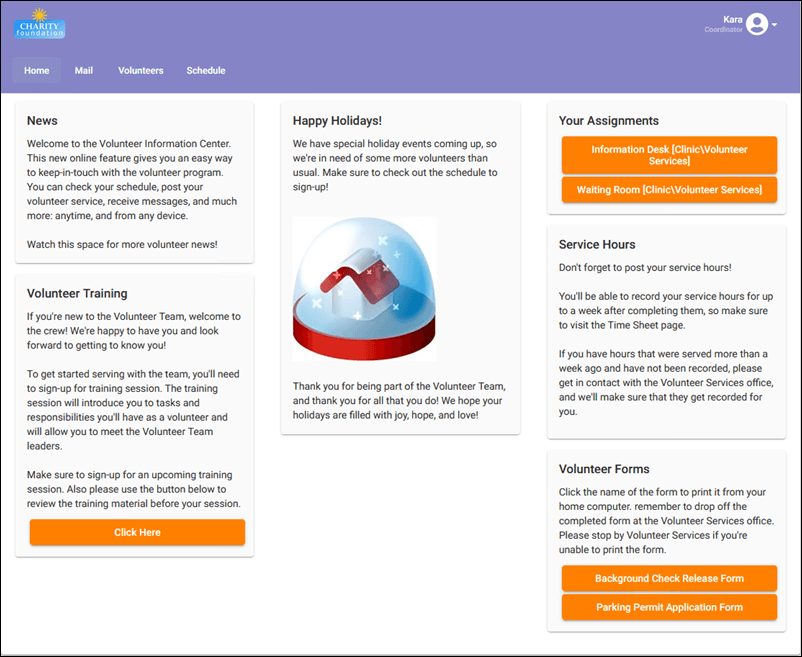
The Home page is the first page you will see when you log in. This page will include news and other kinds of information that your volunteer administrator wishes to share. Do keep in mind that the Home page is visible to both volunteers and Coordinators, so some of the information you see here may be more relevant for volunteers. Below is an example of what the Home page might look like:
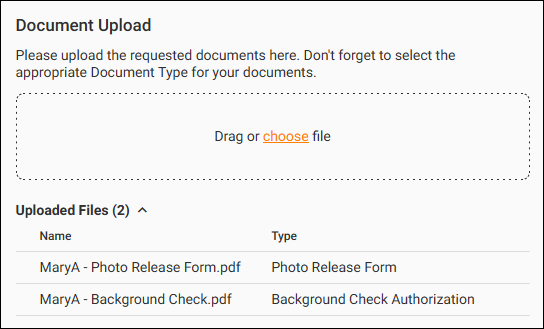
The Home page may also include a place for you to upload documents to your Coordinator record in the Volgistics database. If this is something the volunteer administrator chooses to include, you will see a Document Upload (or similarly named) section on the Home page. In this section, you will see the documents you've previously uploaded and have the option to upload more. This will look like this:
Keep in mind that you will only be able to upload your own documents. You cannot upload documents for your volunteers to be stored in their records.
To upload a document to your own Coordinator record:
- Click the area labeled Drag or choose file and select your document. OR Drag the file you wish to upload into this area.
- Use the Name field to rename the selected file if you'd like.
- Select the kind of document you're uploading in the Type dropdown.
- Click the Upload button.
Mail Page
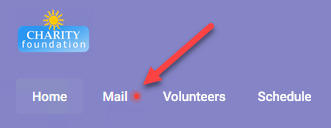
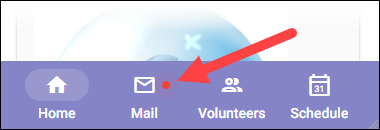
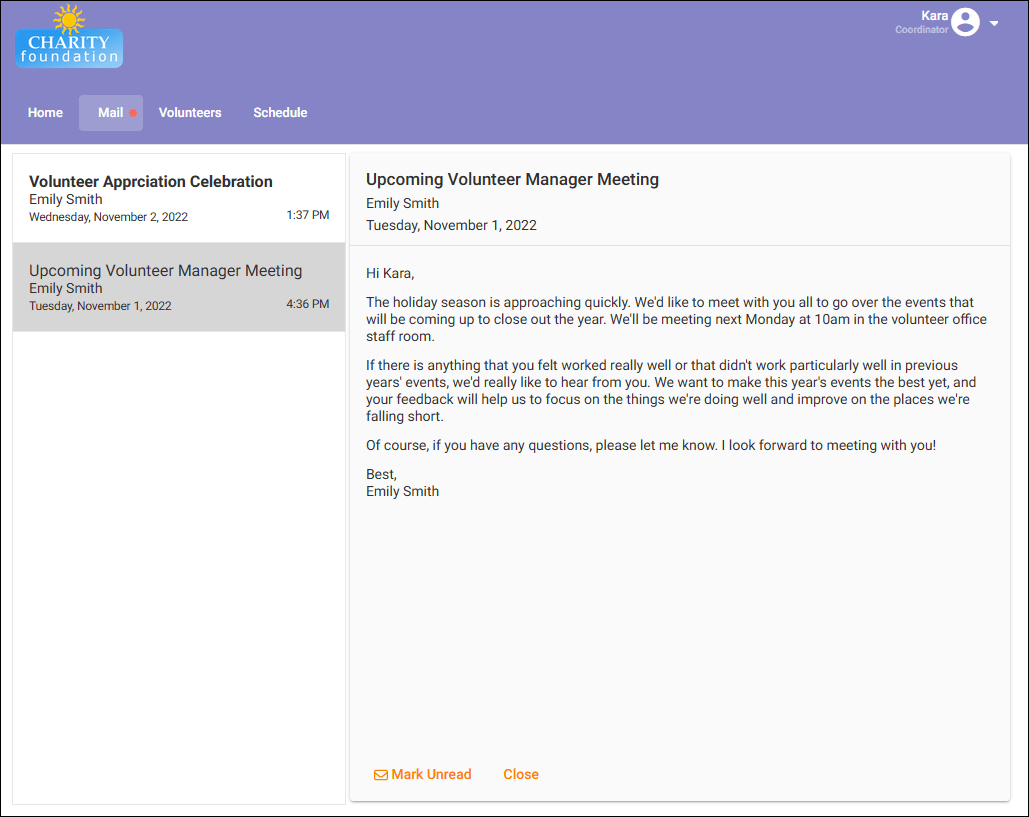
Volunteer administrators will have the ability to send you messages in a variety of forms, and this includes messages sent through VicNet. These kinds of messages are called VicMail messages, and you can review the VicMail messages sent to you on the Mail page. If you have any unread VicMail messages, the Mail page button in the navigation menu will show a pulsing icon next to it. This will look something like this:
Once on the Mail page, you'll find a list of the messages you've received from your volunteer administrator. Unread messages will appear in bold, and you can click on a message to read it.
Volunteers Page
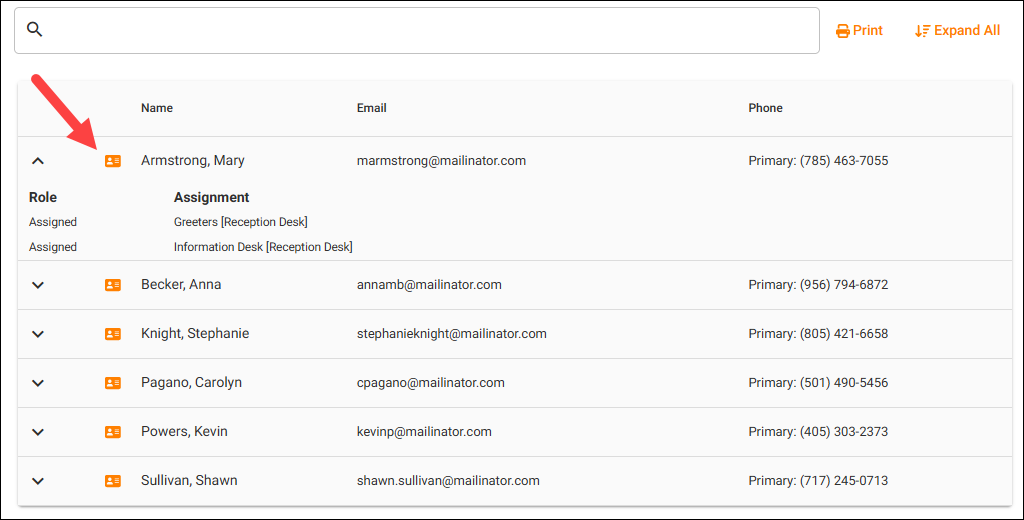
On the Volunteers page, you'll find a list of volunteers with Roles in the assignments you manage. Your organization's administrator(s) will control which volunteers are visible on this page based on their Status and their Roles in your assignments. If a volunteer is not listed here that you believe should be, you'll need to contact an administrator for your organization's database for further assistance.
Each volunteer in the list will show their contact information (if this information has been made available to you), and you can click on the row for a volunteer to see a list of the assignments they are associated with. You can expand the rows for all the volunteers on the page by clicking the Expand All button in the top right. There is also a Print button if you want to print a copy of the list.
To see more detailed information about a volunteer, click the icon to the left of their name.
When you open a volunteer's profile, you'll be able to see and edit details from their volunteer record. However, some fields included in a volunteer's profile may be set up as "read only." Keep in mind that your volunteer administrator will control which information is available to you in volunteer profiles, so if you are not able to edit a field you should be able to or if a field is missing, you'll need to contact an administrator for your organization's database. If you are able to edit volunteer profile information, make sure to click the Save button to keep any changes you've made.
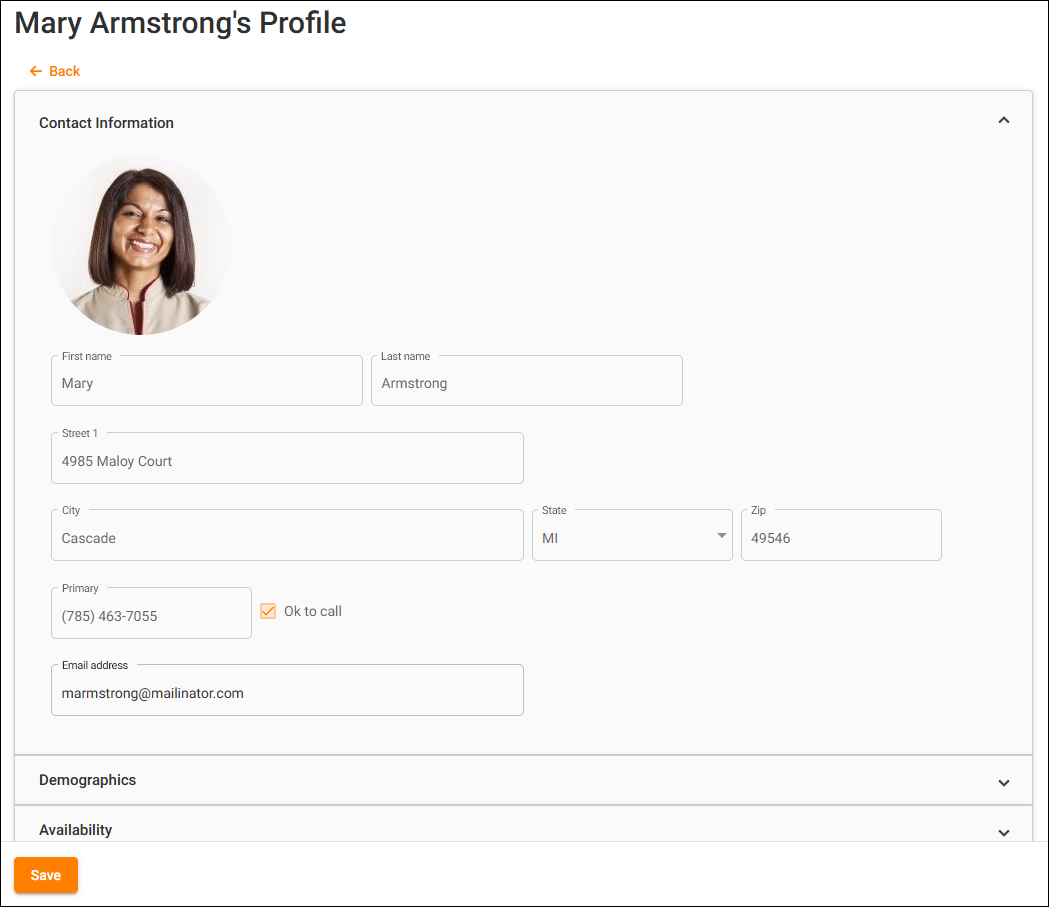
Once you've finished reviewing or editing a volunteer's profile, you can return to your volunteer list by clicking the Back button or by selecting the Volunteers button in the navigation menu.
Schedule Page
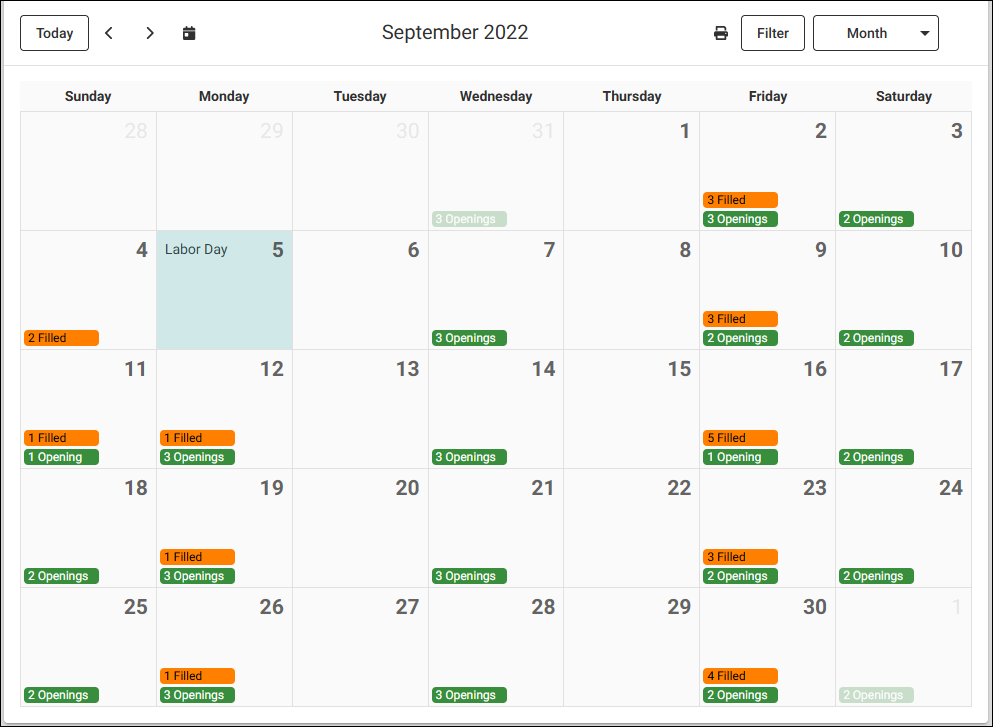
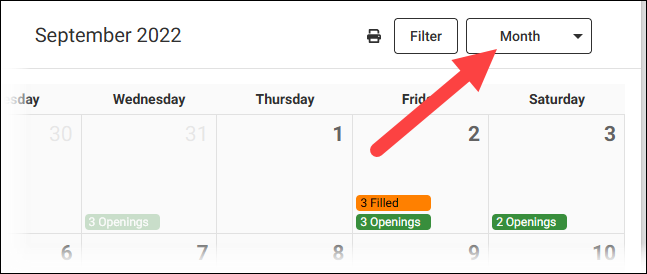
The Schedule page allows you to view the schedules for the assignments that you oversee, and if your volunteer administrator(s) allow, you'll be able to add and remove volunteers from those schedules. You can view the schedule in several different ways, but you'll likely start off seeing the Month view for the current month. Each day in the month will show the number of volunteer shifts that have been filled and the number of shifts that are still open.
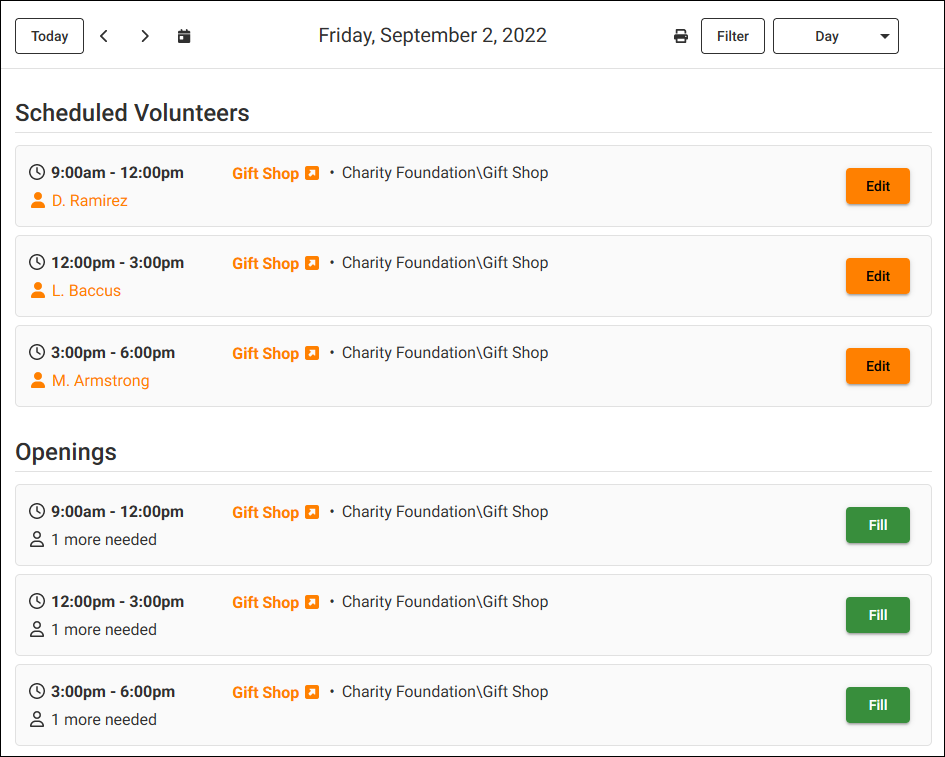
You can click on a date in the calendar to bring up the Day view of the schedule for that date. When you are using the Day view, the schedule information will be split into two sections. The first section will show the filled shifts for that day, and the second section will show the unfilled openings for that day.
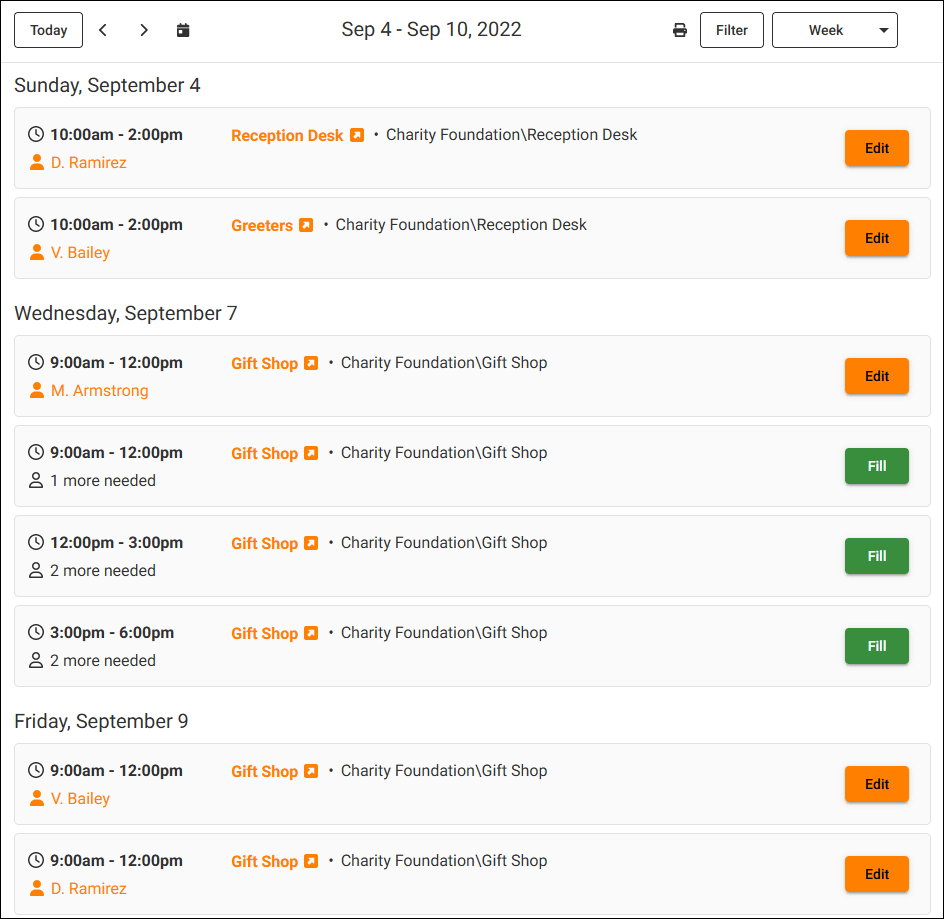
You will also have the option to view the schedule a week at a time using the Week view. The Week view looks very similar to the Day view but the filled and unfilled shifts will be listed together for each day in the week. This way you can view and manage the schedule for multiple days all from one page.
You can change between any of these views at any time using the dropdown at the top right corner of the schedule.
You will also have the ability to filter the information in the schedule using the Filter button. This button appears just to the left of the dropdown used to change your view of the schedule.

With the filter options, you can choose to filter which shifts are shown based on whether they are open or filled and based on the associated Assignment. Once you've selected filter options and applied them, the button will be highlighted and will read Filter Applied to let you know that not all information is being displayed in the schedule. You can clear any filters you've applied by clicking the Filter Applied button and then clicking the Reset button.
If you'd rather see each schedule entry on the monthly view of the schedule, select Details on Month View in the filter and the schedule will show you each schedule entry on the calendar. Because the calendar squares are too small to include all of the information, you can hover your mouse over entries to see more details.

Or, another option is to click the Print icon to see the printable view.

You can navigate through different months, weeks, and days using the options at the top left of the Schedule page. The Today button will take you to the current date. The left and right arrow icons will let you navigate to the previous and next month, week, or day depending on which view of the schedule you're currently using. If you'd like to navigate directly to a specific date, click the calendar icon that appears to the right of the right arrow icon. This will bring up a small calendar that you can use to select the specific date you want to see.

If your organization allows you to manage the schedule for the Assignments you oversee, you'll be able to add volunteers to and remove volunteers from the schedule on the Day and Week views. To schedule a volunteer for an open shift, click the Fill button next to that shift. This will bring up a dialog box with more details about the shift and let you choose which volunteer to add to that shift.

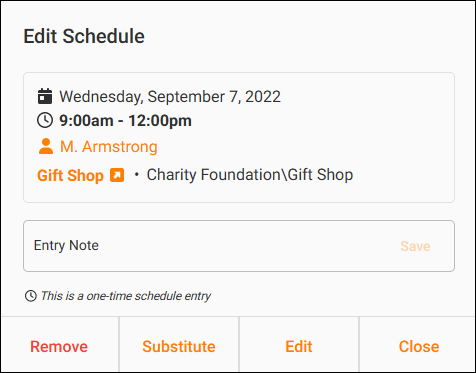
If you want to change a scheduled volunteer's shift, click the Edit button next to that shift. This will bring up a dialog box with additional options for changes you can make. For example, click the Remove button to remove the currently scheduled volunteer from the shift. Or click the Substitute button to schedule a different volunteer in this shift. Or click the Edit button to change the times and frequency the volunteer is scheduled for that shift.
Fill Disabled or Edit Disabled
If you see the Fill Disabled message for an unfilled shift or the Edit Disabled message for a filled shift, it means that you do not have permission to make changes to the schedule for the corresponding Assignment.
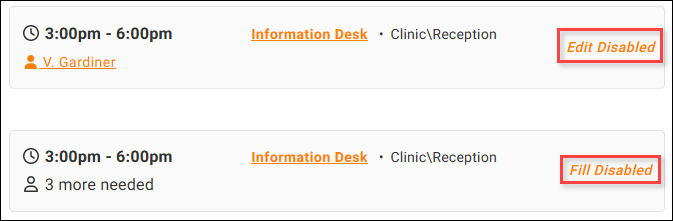
If you should have access to manage the Assignment's schedule, you'll need a volunteer administrator in your account to update the Assignment settings for you.
Please keep in mind that you will only be able to schedule volunteers in unfilled shifts or by substituting them for another volunteer that is already scheduled. You will not be able to create your own openings or schedule volunteers outside of openings in VicNet. Only a volunteer administrator in your account will be able to set up new openings in your Assignments or schedule volunteers outside of those openings.
Additionally, when you initially schedule a volunteer, you will only be able to schedule them for the one date you've selected. If you'd like to set up that volunteer to serve in that shift on a regular basis, you can click the Edit button for that shift after scheduling the volunteer. Then click the Edit button in the dialog box and select the Make Regular option. You'll be able to select whether this schedule should repeat indefinitely or only for a certain time period and also choose how frequently that shift should repeat.
Please Note: When you are planning to schedule a volunteer for a recurring, regular shift, it is a good idea to review the upcoming schedule to see if other volunteers are already scheduled for that shift in the future. If another volunteer is scheduled in that same shift on a future date, the regular shift you're creating will overlap with the volunteer that was already scheduled causing the shift to get double booked.
Assignment Details
You can learn more about an Assignment by clicking the Assignment's name which will appear as a link. This will take you to the Opportunity Directory listing for the Assignment. Depending on how the volunteer managers set up the listing and their account, the listing can show a description of the Assignment, additional directions, contact information, and even a map to the location.

Account Page
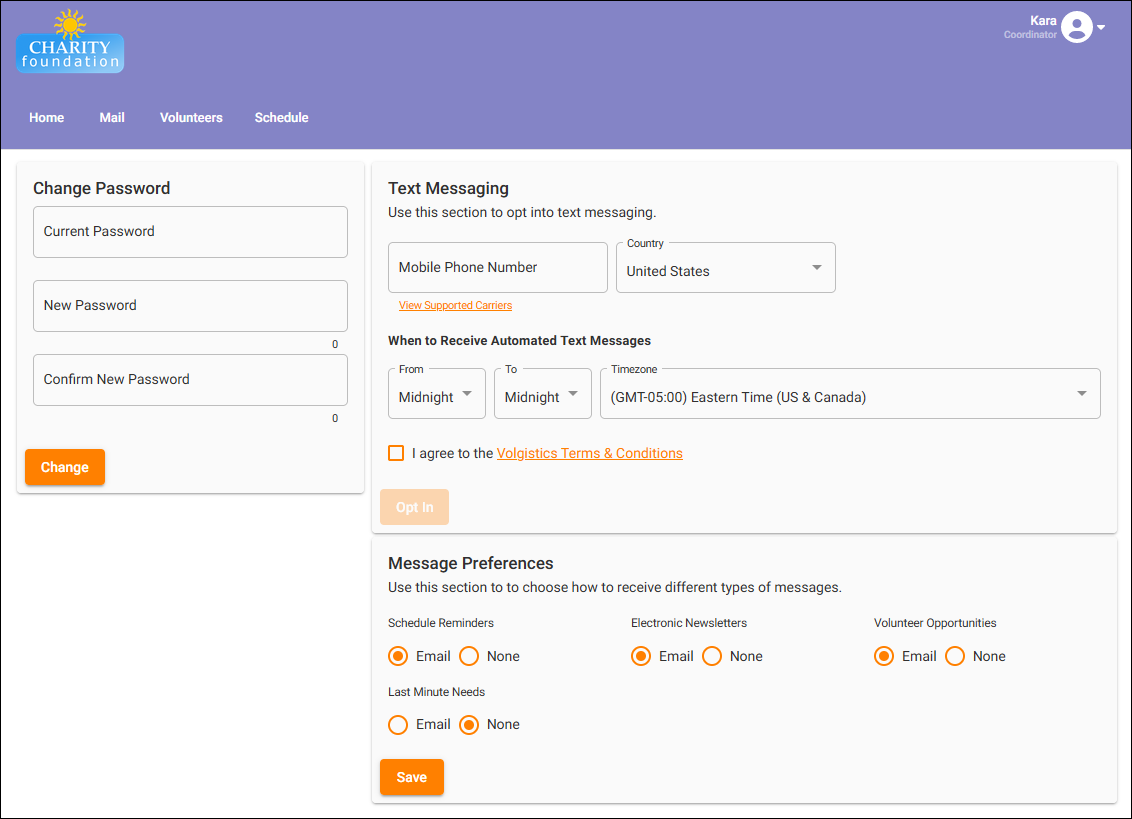
On the Account page, you will be able to manage your VicNet password and your message preferences. You can access these options by selecting the user menu at the top right of the portal and selecting Account.
In the Message Preferences section, you can select Email next to each of the message types you'd like to receive and None next to the message types you do not wish to receive.
If text messaging is enabled for your organization, you can opt in to receive these kinds of messages by completing the form in the Message Preferences section. Here you will enter your mobile phone number, choose when you'd like to receive automated messages (like schedule reminders), agree to the terms, and click the Opt In button. Once you've completed this form, you'll receive a text message to confirm your opt in, and you will need to reply YES to that message to complete the process. After you've opted in, each kind of message will have another option so that you can choose to receive those messages by text.
If you have already opted in to receive text messages but don't want to receive these kinds of messages anymore, you can opt out of this feature on the Account page as well. To do this, click the Opt Out button at the top of the Message Preferences section and confirm that you no longer want to receive these messages.
Please Note
This help topic is designed to serve as an introduction to the look and function of the VicNet module. Your organization's VicNet portal will likely look at least slightly different. For this reason, you should reach out to a volunteer administrator at your organization directly if you have any questions about accessing VicNet or how you should be using it.