Docs Tab for Sites, Places, and Assignments
The Docs tab is the last tab on the right hand side of Site, Place, and Assignment records. It is used to store electronic documents uploaded for the Site, Place, or Assignment using the VicDocs feature.
If you are not able to see the tab, one (or both) of the following apply:
- Your System Operator rights do not allow access to the tab. You will need to contact your account's Administrator for further assistance in this case.
- Your account's service level does not include VicDocs. In this case, you can add VicDocs to service level through the Store.
This help topic reviews some of the basic features of the Docs tab on a Site, Place, or Assignment record. You can find these records by selecting Assignments on your Volgistics menu.
If you'd like to work with documents uploaded to the Docs tab of all of your Site, Place, or Assignment records, see the Volunteers & Other Sub-Tabs section of Mailbox Documents Tab.
Stored Documents
The top section of the Docs tab is titled Documents and it is where you will see documents that have been uploaded for the Site, Place, or Assignment.

The sections below have more information on how to use the controls for the top portion of the Docs tab.
Open or Print Documents
Most web browsers automatically use a built-in PDF viewer to open PDF report files. If this is not occurring when you click the name of a file, see your web browser's support or search the internet for information on changing the setting.
Web browsers can also be configured to use an Adobe program such as Adobe Acrobat Reader instead of the built-in viewer to open PDF files. See Cannot Open PDF File in this case.
After you have the document open, you can use the Print feature in whatever program was used to open the document to send the document to your printer.
Save Documents Locally
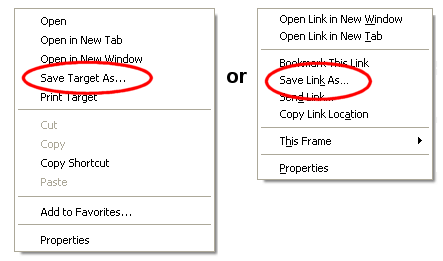
You can save uploaded documents to your local computer (flash drive or other storage medium) without opening the file if you wish. To do this, right-click on the name of the document and then select Save target as..., Save link as..., or Save as... from the prompt.
If you want to save all of the documents that are uploaded, we also have a built-in data export feature that you can use instead of saving each document individually.
Rename Documents and Change or Assign Document Types
You can change the name that shows for an uploaded document, add a document type to documents without a type, or change the type recorded for a document. To do any of these things, click the Edit button on the right side of the row where the document appears. An Edit Document box will pop up. Edit or replace the document's name, or add or update the type, and then click the Save button to keep your changes. Click the Cancel button to close the window without making changes.
Delete Documents
To delete uploaded documents, check the box in the column on the left side by each document you want to delete. If you want to delete all of the documents on the page, scroll down to the bottom of the Documents section and click the Check All button. Once the documents you want to delete are marked, click the Delete Checked button. A pop-up will appear to make sure you want to completely delete the documents. Click the OK button to proceed or the Cancel button if you changed your mind and you would like to keep the documents.
There is not a way to recover documents after they have been deleted so please make sure you want to delete the documents before you proceed.
The Delete Checked button does not appear . . .
If the Delete Checked button does not appear on the Docs tab it means one of two things. There are either no documents uploaded for the Site, Place, or Assignment yet, or your System Operator rights do not allow you to delete documents. Your operator rights are controlled by the Administrator of your Volgistics account as shown in Documents Tab Settings.
Sorting Documents
By default the Docs tab is sorted according to the order the documents were added to your database. The most recently added documents will be at the top. You can change the view to be sorted by the Kind, File Name, Document Type, or Uploaded column instead. Just click on a column heading to sort the view based on that column's information.

Filtering Documents
You can filter the Docs tab to only show certain documents. To do this, click the Filter button in the top left corner. This will open a dialog box where you can select the filter options.
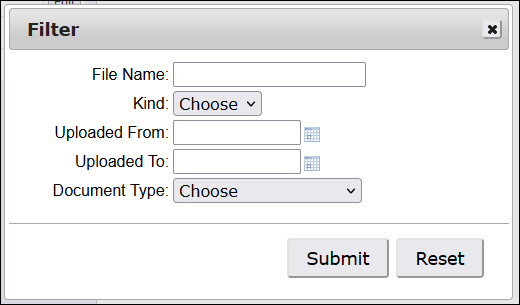
There is more information on how each item works below. Please note that you can use more than one option at the same time to refine the documents shown. The filtered view will only show documents that meet all of the requirements you select.
- File Name: Type the name of the file you want to see followed by an asterisk (*). The asterisk can also be used as a wildcard. For example, typing Wai* would bring up documents titled Waiting List Agreement and Waiver. The wildcard can be used at the beginning of your search as well. Entering *Agreement would bring up documents titled Assignment Rules Agreement, Assignment Description & Agreement, and Waiting List Agreement. You can also use more than one wildcard in your search. So you could use book to find documents titled Assignment Handbook and First Aid Booklet.
- Kind: Use the dropdown to select the file format of the documents you want to have shown.
- Uploaded From: Enter a date to limit the Docs tab to just documents uploaded on or after a certain date.
- Uploaded To: Enter a date to limit the Docs tab to just documents uploaded on or before a certain date.
- Document Type: Use the dropdown to filter the volunteer's documents to only those that have the selected Document Type.
Resetting the Filter
If your view of the Docs tab is currently filtered, there will be a Reset Filter button to the right of the word Documents at the top left of the page.

Click the Reset Filter button to return the Docs tab to the un-filtered view.
Uploading Documents
The bottom section of the Docs tab is titled Upload and it is where you can upload documents for the Site, Place, or Assignment.
The sections below have more information on how to use the controls for the bottom portion of the Docs tab.
The Upload section does not appear . . .
If you do not see the Upload section at the bottom of the Docs tab, one of the following applies:
- Your System Operator rights do not include the right to upload documents to this tab. In this case, you will need to contact your account's Administrator to have them change your operator rights for the tab.
- The Docs tab has reached its capacity of 50 documents. In this case, you will need to delete older documents in order to upload new documents.
File Types
The following file types can be uploaded for a Site, Place, or Assignment:
| File Type | File Extension(s) |
|---|---|
| Image | .bmp, .gif, .jpeg, .jpg, .png |
| Microsoft Excel | .xls, .xlsx |
| Microsoft PowerPoint | .ppt, .pptx |
| Microsoft Word | .doc, .docx |
| Portable Document Format (PDF) | .pdf |
| Text | .rtf, .txt |
Capacity and File Size
The Docs tab can hold up to 50 electronic document files that are 10 megabytes (10,485,760 bytes) or smaller. There is not a way to upload over 50 documents, or upload files larger than 10 megabytes. If you have reached the 50 file limit, older files can be deleted. If a file is over the size limit, you can optimize or compress the file to make it smaller.
Optimizing or Compressing Files
Before uploading larger files, we recommend optimizing or compressing the file first. This reduces the file size, which means it will upload, open, and transfer faster. Optimization and compression usually apply only to image and PDF files. Generally the program used to create the file will have features that allow you to optimize or compress the file.
The method you use to optimize the file will depend on the program you use to create it. If you're unfamiliar with optimizing documents and files, you an learn more on our Optimize PDF Files blog post. You may need to search the Internet, or refer to the help documentation for the program you use, for more information on how to reduce the file's size.
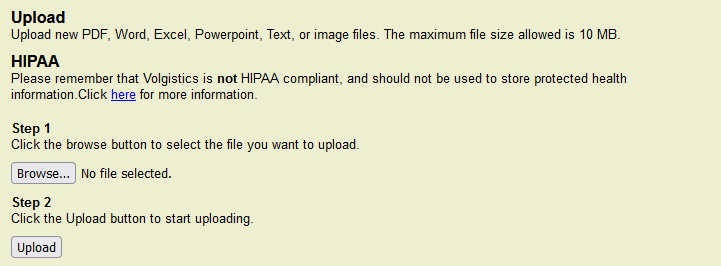
Uploading Files
You can upload files to the Docs tab by:
- Click the Choose File or Browse button.
- Select the file to upload and click the Open button. You can find acceptable file formats (types or extensions) here.
- Select the type of document you're uploading.
- Click the Upload button. Once the upload is complete, your document will be listed in the Documents section of the Docs tab.
Document Storage and HIPAA
Please keep in mind that Volgistics is designed to be a volunteer management system. As such it is not intended to be used to store, process or transmit HIPAA protected information so it is not a Covered Entity for HIPAA regulations.
Virus Scanning
To protect the system and your account, Volgistics automatically scans documents for possible viruses before making the document available. You will see a "(waiting to be scanned)" message after the document's name while this is being done, and the document's name will not be a clickable link. In some cases, you will need to click the Refresh button in the top or bottom left corner to have the tab update after the scan has been completed.
If a virus is found on a document, it will be removed from the system and an alert will be sent to the In Box of your Volgistics mailbox.
Related Help
- Cannot Open Excel Files
- Documents Tab of Mailbox
- Save Volunteer Information Locally
- Cannot Open PDF File
- Documents Tab Settings