Out Box Tab Overview
The Mailbox's Out Box tab is your account's message center. You can use it to compose email, VicMail, and text messages to your volunteers and Coordinators, view and manage your history of sent messages, and compose messages to send out later. If you are not already on the Out Box tab, you can get there by selecting Mailbox from the menu, and then clicking the Out Box tab.
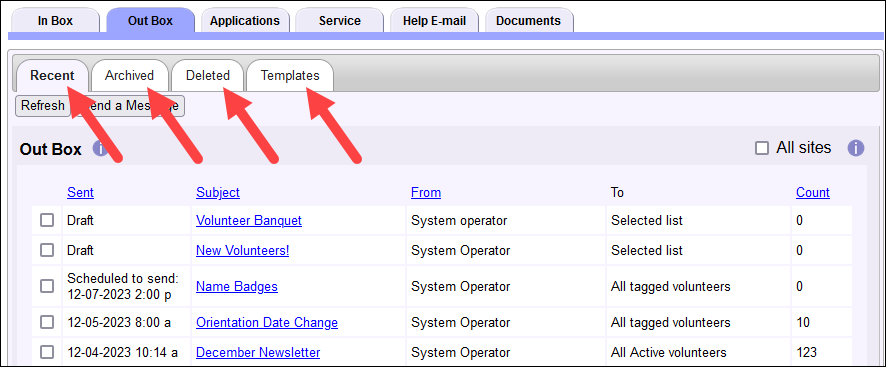
The Out Box tab is divided into four sub-tabs for organizing your messages. These are the Recent, Archived, Deleted, and Templates sub-tabs.
This help topic covers how the Out Box tab works in your Volgistics account.
Sending Messages From the Out Box Tab
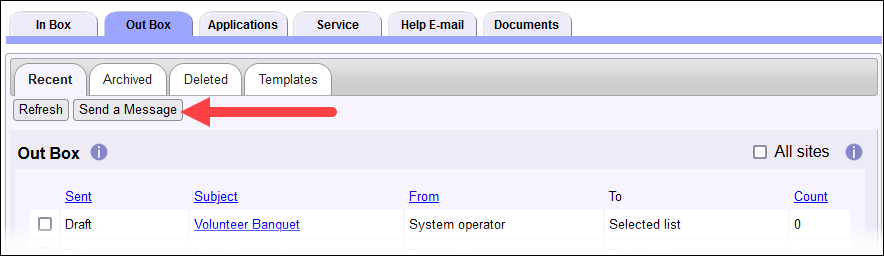
You can send VicMail, email messages, and text messages to your volunteers and Coordinators from the Out Box tab. To start a message, click the Send a Message button at the top of the tab.
Site Level Access and the Out Box Tab
If your organization uses Site Level Access and a System Operator is logged in as a Headquarters Operator, the Out Box tab will have a checkbox for All Sites in the upper right corner. If this box is checked, the Operator will view messages generated by Headquarters as well as messages generated by Site-Level Operators and Multi-Site Level Operators. If the All Sites box is un-checked, only messages generated by Headquarters will be displayed on a Headquarters Operator's Out Box tab.
Users logged in as Site-Level Operators or Multi-Site Level Operators will not see the All Sites checkbox on the Out Box tab. Site-Level Operators (those Operators that are assigned to one specific Site) will only see messages generated at their Site. Multi-Site Level Operators (those Operators that are assigned to multiple Sites and can switch between them) will only see messages generated at the Site they are currently associated with.
Sorting the Out Box Tab
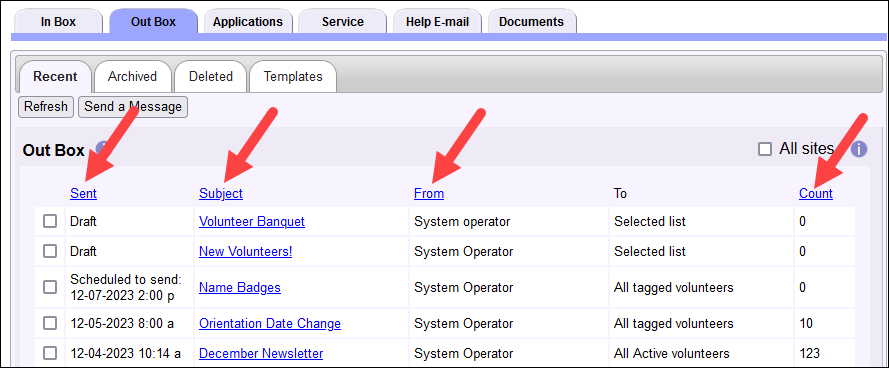
By default, all of the sub-tabs are sorted by the Sent column with the most recent items at the top. On the Recent and Deleted sub-tabs, Draft messages appear above sent messages. As your Out Box tab grows to contain more messages, it may become difficult to find an item you're looking for. To help you with this, Volgistics allows you to sort the sub-tabs by the Sent, Subject, From, and Count columns. Just click on the column heading to sort the messages on the sub-tab based on that column's information.
Viewing Stored Messages
To see details about any message on a sub-tab, just click on the subject of the message. When you do this you can view information such as how the message was sent, the volunteers it was sent to and the content of the message.
The message's content box will vary in appearance depending on the web browser you use. For example, some browsers do not allow you to scroll to see all of the information in the content box. With most browsers you can highlight and copy the message's content even if it appears to be grayed out.
The controls available on the message differ depending on which sub-tab you're on. Sent messages viewed from the Recent sub-tab have Save as Template, Archive, and Delete buttons. Messages viewed from the Archived sub-tab have Save as Template and Delete buttons. Sent messages on the Deleted sub-tab have Restore, Delete Permanently, and Cancel buttons. Draft messages on the Deleted sub-tab will have the same options available as they do on the Recent sub-tab. If you send a Draft message from the Deleted sub-tab, the sent message will automatically show on the Recent sub-tab.
The Templates sub-tab shows the messages you've saved as templates to send over and over. When you select a message on this sub-tab, you will have options to change the template settings and contents. You'll find Save Template and Cancel buttons here.
Recipient List on Stored Messages
When you view a sent message as shown in the Viewing Stored Messages section, you will see a list of volunteers and Coordinators who the message was sent to. When a message was sent to both volunteers and Coordinators, the volunteer names will appear first and then the Coordinator names will be listed at the end. If a name appears on the list, but is crossed off, it means the person could not receive the message due to one of the reasons listed in the Message Sent section of How to Send an Email Message.
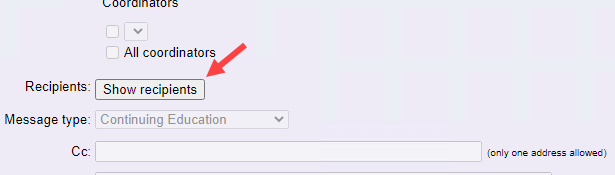
On the Archived sub-tab, this list is collapsed initially so you need to click the Show recipients button to see this list.
In order to be on the recipient list, the volunteer's record needs to be in the non-archived section of your database. Records that have been deleted, or archived, will no longer appear on the recipient list.
Recent Sub-Tab
The Recent sub-tab shows by default when you select the Out Box tab. It has messages that were saved as Drafts or Scheduled to send in the future when they were created. The sub-tab also has sent messages that are less than 180 days old. After 180 days, sent messages are automatically moved to the Archived sub-tab.
Draft messages and messages scheduled to send in the future can only be deleted so those messages will never go to the Archived sub-tab. The system will never delete messages automatically. The only way messages can be deleted is when a System Operator makes the change.
If a volunteer was the recipient of a message that was sent, the subject and date of the message will also appear in the message history kept on the History tab of their record in the Messages section.
System Operators can archive or delete sent messages individually or in groups. To archive or delete a single message that was sent, view the stored message and then click the Archive or Delete button in the lower right corner of the message.
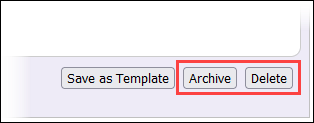
When you view a message on the Recent sub-tab, you can also choose to save that message as a template. This is very useful if you regularly send out very similar emails to your volunteers or Coordinators. Saving a message as a template creates a copy of that message on the Templates sub-tab of the Out Box, and you can use it to quickly create new messages with the same contents. To save a message as a template, click the Save as Template button in the bottom right corner next to the Archive and Delete buttons.
Recent messages can also be archived or deleted in bulk. To do that, check the box to the left of the messages and then click the Archive or Delete button at the lower left of the page.
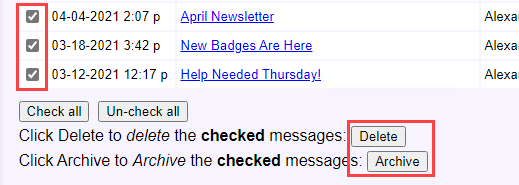
There is also a Check all button you can use if you'd like to archive or delete all of the records on the page as well as an Un-check all button in case the Check all button was clicked by mistake. And if you'd like to delete or archive multiple items but not all of them, you can check the boxes for a range of items. To do that, check the box for the first item in the range, hold down the Shift key, and then click on the last item in the range you want to select. All the items in the range will be checked for you.
As mentioned earlier, messages that are saved as a Draft or scheduled to send in the future cannot be archived so if they are checked when the Archive button is clicked, you'll receive a message that only the sent messages that are checked were archived.
Archived Sub-Tab
The Archived sub-tab shows messages that have been manually archived as well as sent messages that were automatically moved to the Archived sub-tab from the Recent sub-tab after 180 days. Messages in this section will remain indefinitely unless they are deleted. There is not a way to send a message from the Archived sub-tab back to the Recent sub-tab because there are not any actions that can be taken on the Recent sub-tab that cannot also be taken from the Archived sub-tab.
If a volunteer was the recipient of a message stored on the Archived sub-tab, the subject and date of the message will appear on the History tab of the volunteers record in the Messages section and Archived sub-tab.
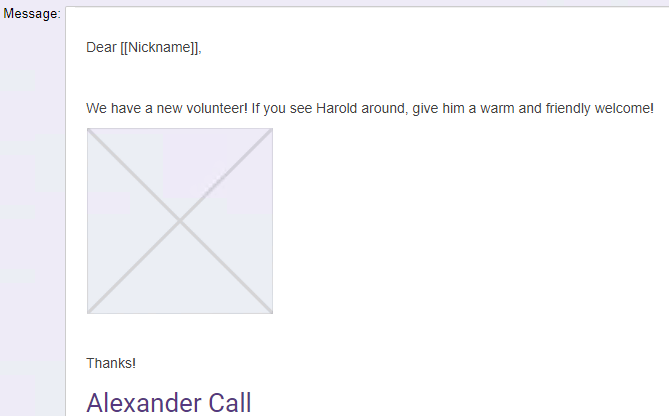
Because photo or picture files are larger than text files, it would not be practical for Volgistics to store all images included in messages. So when the system archives a message the image files are deleted from the system. If you view an archived message that had pictures in it, you'll see placeholders in the message where the images were.
Similarly to sent messages on the Recent sub-tab, operators can delete an individual message or a group of messages all at once. See the Recent Sub-Tab section above if you need assistance with this.
Deleted Sub-Tab
The Deleted sub-tab shows messages that have been deleted from the Recent or Archived sub-tabs as well as any templates deleted from the Templates sub-tab. Messages and templates sent to this tab remain for seven (7) days after they are deleted to allow you to recover them if they were accidentally deleted. If they are not recovered within seven days, they are permanently deleted from the system. System Operators can also choose to permanently delete messages and templates before the seven day holding period if they wish.
If a volunteer was the recipient of a message that is on the Deleted sub-tab, the subject and date of the message will continue to appear in the message history on the History tab of the volunteer's record in the Messages section until it is permanently deleted from the system. Once the message is permanently deleted, the subject and date will be removed from the volunteer's message history. If you complete the action to permanently delete the message yourself, you may see the subject and date for a brief time still on the volunteer's record. This is because the process to remove the date and time from the volunteer's record is performed during the overnight maintenance cycle.
As mentioned above, when messages are permanently deleted the message details will no longer show on the Out Box of the mailbox, or on the volunteer records. However, you account's Event Log will still show the date, time, and subject along with which System Operator composed and sent the message.
As with the other sub-tabs, you can restore or permanently delete the messages and templates on the Deleted sub-tab individually or you can check the boxes to take the action with more than one message or template at once. See the Recent Sub-Tab section above if you need assistance with this.
Templates Sub-Tab
The Templates sub-tab lets you create and store messages that you send on a regular basis. The messages stored here can be used when you create a new message to automatically populate the message with the saved contents.
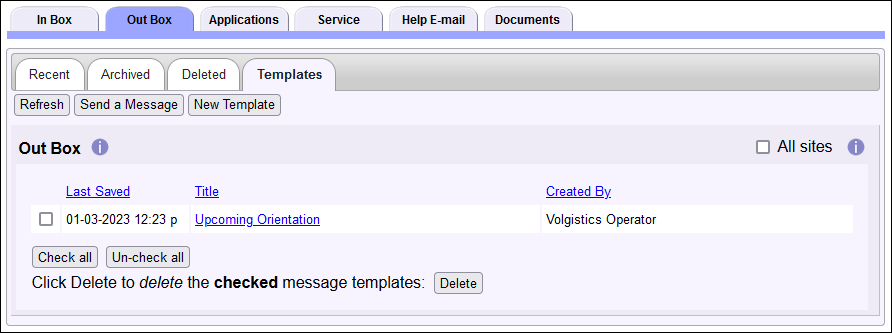
You can create new templates from scratch by clicking the New Template button at the top of the sub-tab, and you can edit existing templates by clicking on the title of the template you wish to change. You can learn more about creating and changing templates in the Message Templates help topic.
If you wish to remove a template, check the box next to that template and click the Delete button at the bottom of the tab. You can check the boxes for multiple templates at once if you'd like, and there are Check all and Un-check all buttons to assist you with this if needed.