Message Templates
Message templates allow you to save the contents of a message to reuse for future messages. For example, many organizations like to send out an introductory email to new volunteers to explain how they should clock-in at VicTouch or sign-up for shifts through VicNet. Rather than typing out the message each time, they could save the message as a template and quickly load the message into their emails each time they need to send it. This can save a lot of time when composing and sending messages.
Create Templates
To start using templates, you need to create the templates you wish to use. There are a couple of ways to do this. You can create templates from scratch, and generate templates from messages that you've already created and/or sent. Let's walk through each of these methods in detail.
From Scratch
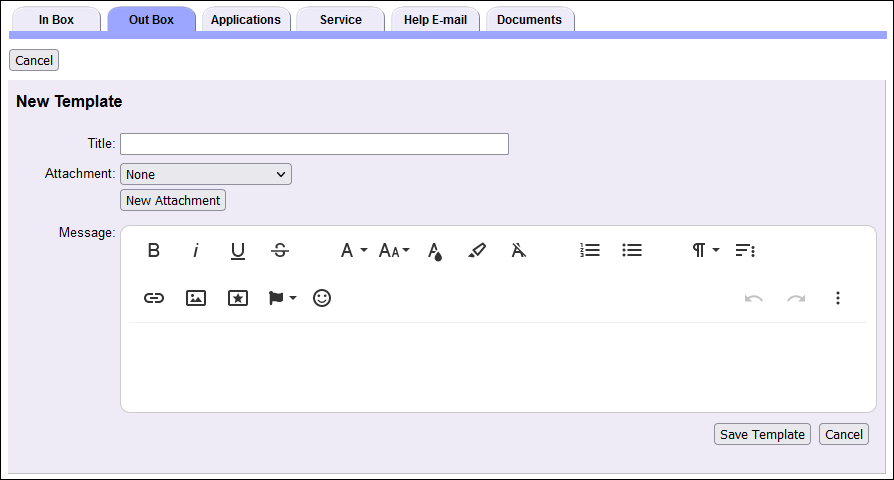
Brand new templates are created in the Out Box tab of the Mailbox on the Templates sub-tab. This tab also lets you manage any templates that you've previously created. To create a new template from scratch:
- Choose Mailbox from the menu.
- Select the Out Box tab.
- Select the Templates sub-tab.
- Click New Template.
-
If your account uses the Site Level Access feature and you are set up as a Headquarters Operator, you can choose which Operators are allowed to use the new template. You can choose to make it available to just Headquarters Operators or Operators at any Site.
If your account does not use Site Level Access or you are a Site Level Operator, you will not see this setting.
-
Enter a Title for the template.
- Optionally add any attachments that you wish to be linked to the template. Files you attach to the template will be automatically attached to your message when you load the template.
- Compose the contents of your Message using the rich text editor just like you would if you were sending an email or VicMail message normally.
- Click the Save Template button.
Now the new template will appear in the list on the Templates sub-tab. If you ever need to make changes to an existing template, simply click the link for the title of the template, make the desired changes, and save.
From an Existing Message
When you create a new message in the Out Box or view a message you've previously saved or sent, you'll have the option to save the contents of that message as a new template. So if you've already sent a message that you'd like to save as a template, you don't need to recreate it using the steps in the From Scratch section above. Instead, you can follow these steps:
- Choose Mailbox from the menu.
- Select the Out Box tab.
- Click the link for the message you wish to save as a template. You can save templates from messages on the Recent or Archived sub-tabs.
- At the bottom right of the message, click Save as Template. This will appear next to the Archive and Delete buttons for sent messages and next to the Send dropdown and Save Draft and Cancel buttons for messages that have not been sent yet.
Once you save the message as a template, you'll be returned to the Out Box, and a new template will be added on the Templates sub-tab. If you'd like to review the new template you've created or make any changes to it, select the Templates sub-tab and click the link for the template that you created. It will use the subject for the message you copied as its title.
Load Templates
Once you have created templates, you can load the contents of those templates into the emails and VicMail messages you send to volunteers and Coordinators. You can create messages in the Out Box tab of the Mailbox and using the Messages icon on pages that list volunteers. You can load templates either way you choose to create your message. Here we will explain how to load templates when you create a brand new message in the Out Box.
- Choose Mailbox from the menu.
- Select the Out Box tab.
- Click Send a Message.
- Choose how you'd like to send the message (by Email and/or VicMail), choose who you'd like to send the message to, and select the type of message you are sending.
-
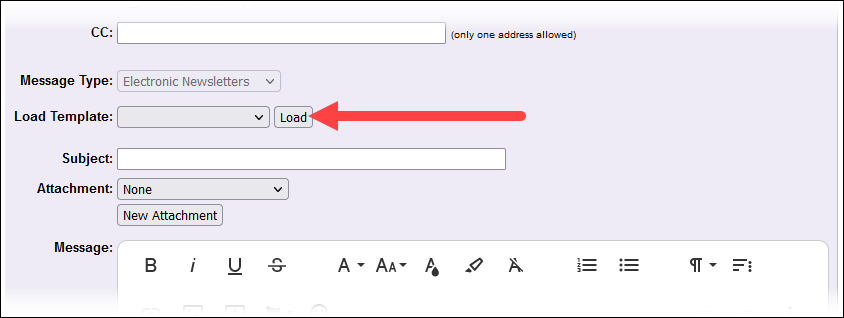
Use the Load Template dropdown to select the template you wish to use for this message and click the Load button.
If you use Site Level Access and are a Headquarters Operator, you will only see the Headquarters templates by default. You can check the All Sites checkbox next to the dropdown to view and choose from Site-specific templates.
-
The contents of your template will be populated into your message, including any attachments you added to your template. If you need to make changes to the imported message, you can do so using the rich text editor.
Note
If you previously entered any content into your message, this will be overwritten when you load the template. You should always start by loading your template and then make any changes or additions that you need.
-
Once you're finished, use the Send dropdown to select Send Now to send the message immediately. Or use the Send dropdown to select Schedule Send to schedule your message to be sent at a future time.