Include Email Attachments
In Volgistics, you can choose to attach PDF files and Microsoft Word documents (DOC or DOCX) to the messages that you send from your account. To send a message with attachments:
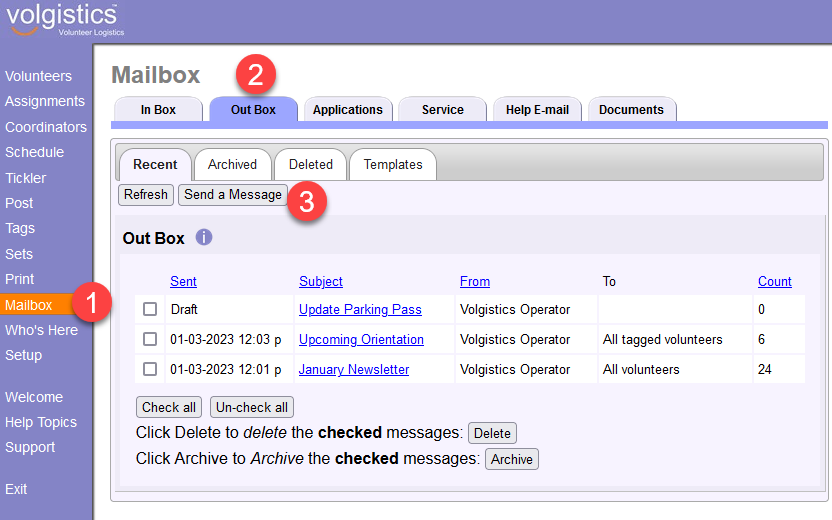
- Choose Mailbox from the menu.
- Select the Out Box tab.
-
Click the Send a Message button.
-
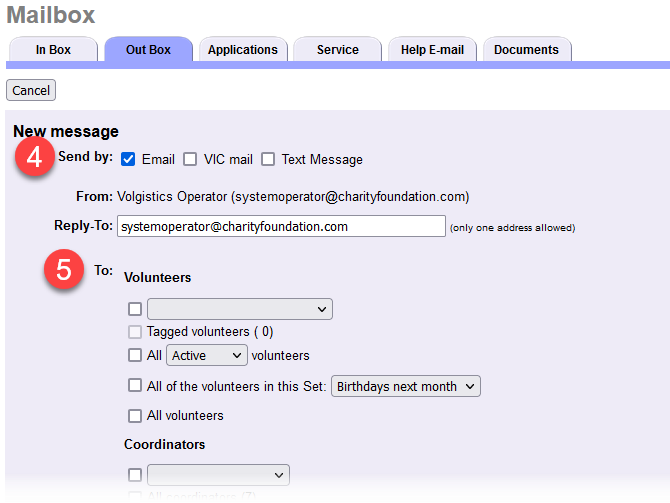
Next to Send by, choose how you would like this message to be delivered. Attachments can be included in both email and VicMail messages, so you can send your attachments to volunteers using either (or both) of these methods.
-
In the To options, choose which volunteers and/or Coordinators you'd like to send your message to.
-
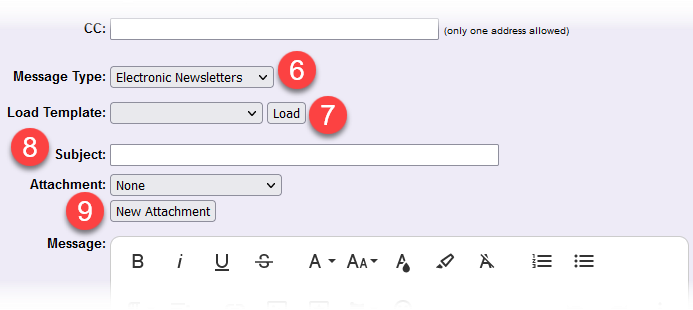
If your message is being sent to more than one person, you will need to choose the Message type you'd like to associate with this message. This field works with your volunteers' Message Preferences which allow them to control which kinds of messages they receive from you.
- Optionally use the Load Template option to import the contents of a saved template into your message.
-
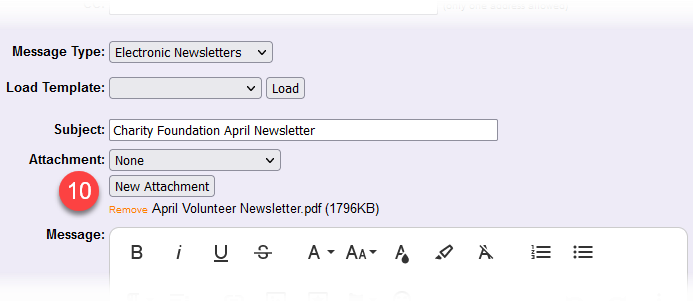
Enter a subject for your message.
-
Select the file you'd like to attach to your message. If the file has already been uploaded to the Attachments sub-tab of the Mailbox Documents tab, use the Attachment dropdown to select the file.
Alternatively, if you'd like to attach a new file to your message:
- Click the New Attachment button.
- Locate and select the file you'd like to attach to your message.
-
Click the Upload button.

Note
The documents that you attach to your messages will be stored on the Attachments sub-tab of the Mailbox Documents tab. The number of files you can upload and store on this tab will depend on the number of System Operators included in your service level. Your storage capacity is equal to 15 files plus 5 additional files for each System Operator. For example, if your account's service level includes three System Operators, you would have space for 30 documents on the Attachments sub-tab (15 + 3 × 5 = 30).
Once you've reached your document storage capacity, you will not be able to upload any new documents to attach to messages. You'll need to delete existing files you've uploaded to this tab in order to upload new ones.
-
Repeat step 9 for each file you'd like to attach to your message. Please keep in mind that the total size of your email cannot exceed 25 MB. If you'd like to remove an attachment that you've selected, you can click the orange Remove link next to the name of that file.
-
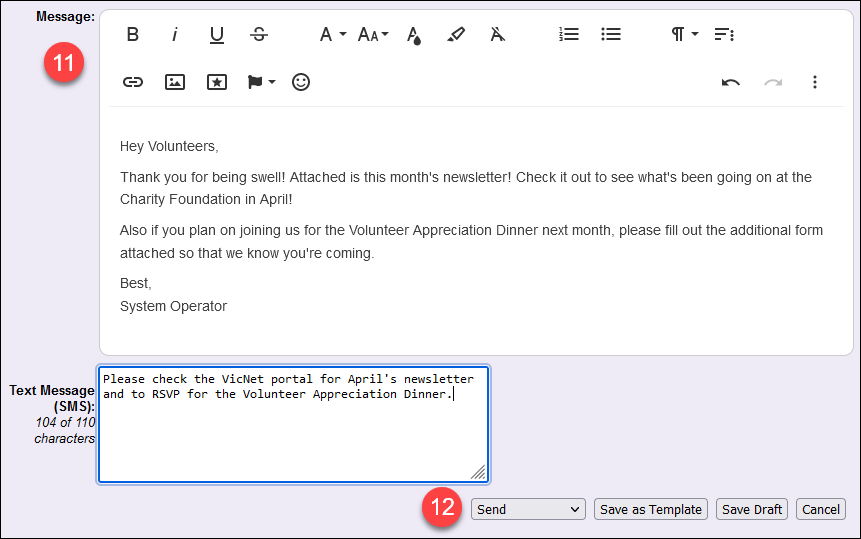
Compose your message in the rich text editor. If you selected to send your message by text in addition to email or VicMail in step 4, there will be an additional field for entering your text message. Keep in mind that the attachment cannot be sent with your text message, though.
-
Save or send your message:
- If you need to step away or take a break from composing your message, click Save Draft to save your progress.
- If you want to send your message immediately, use the Send dropdown to select Send Now.
- If you want to schedule your message to send at a future time, use the Send dropdown to select Schedule Send and use the options in the pop-up dialog to select the date and time you'd like your message sent.
Related Help
- Using the Rich Text Editor
- Email Content Looks Different to Recipients
- Recipient Cannot Open Microsoft Word Attachment
- Out Box Tab Overview
- Documents Tab of Mailbox
- Send an Email Message Overview