Delete a Checklist Item
Use the Checklist item setup page to delete a Checklist item you track in Volgistics. If you're not already on the Checklist item setup page you can get there by following these steps:
- Choose Setup from the menu.
- Expand Checklist Items.
- Click the name of the Checklist item you want to delete.
Only delete a Checklist item if you are certain you want to completely remove the item and all associated Checklist dates from the system. If you have found that you have inadvertently created duplicate Checklist items, you should combine Checklist items instead of deleting one.
To delete the item, scroll to the bottom of the Checklist item setup page and click the Delete this item button. A warning stating that "This Checklist item will be deleted, along with ALL of the volunteer Checklist date records for THIS item" will appear. Click the OK button to proceed with the deletion.
Nothing Happens!
If nothing happens when you click Delete this item, you may have asked your browser to stop displaying alert dialogs. When the dialog isn't displayed, you can't provide a positive response, and Volgistics won't be able to complete the action. Fortunately, this choice only remains in effect for the current browsing session, so you can reset it by simply closing your browser and re-opening it.
Important Things to Note before Deleting a Checklist Item
- If you delete an entire Checklist item, the corresponding Checklist date entries on the History tab in the record of any volunteer who previously completed the item will also be removed.
- There is not a way to "undo" this kind of deletion. Once you delete a Checklist item, you cannot recover information about this item or any volunteer's Checklist dates for this item.
- It's okay to delete a Checklist item if the dates when volunteers completed it are no longer needed, or if the item was created but never actually used.
- There is not a way to preserve past Checklist date records without having a corresponding Checklist item.
If you want to keep the past date history for a Checklist item you no longer use, you should change the Checklist item's setup so it no longer applies to any volunteers. Once you have made this change, do not delete the item. It will still appear under Checklist Items in Setup and on the Checklist page, but it will not apply to any volunteers.
To Make a Checklist Item Apply to None of Your Volunteers:
- Choose Setup from the menu.
- Expand Checklist Items.
- Click on the name of the item of interest.
- Under How often must volunteers complete this checklist item?, select Never.
- Click the Save button to save your changes.
How Does This Impact the History Tab?
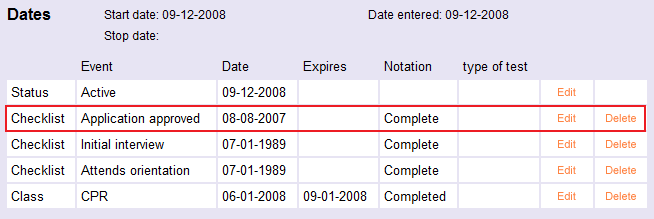
When a Checklist item applies to a volunteer and that volunteer has completed the required item, the item appears in the Dates box on the History tab in his or her volunteer record. In the following example, the Application approved Checklist item was completed on 08-08-2007:
Now, after taking the steps to delete the Application approved Checklist item from this account, the same volunteer's Dates box will appear as seen below:
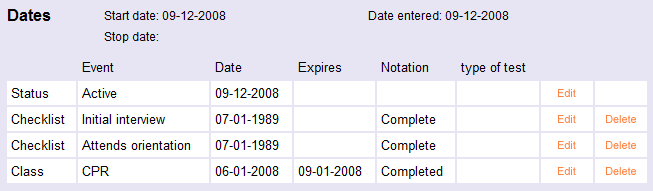
Note that there is no longer any record of this volunteer completing the Application approved Checklist item.