Create a Checklist Item
Use Sets with Checklist Items
Use the Checklist item setup page to create a new Checklist item, or to change the way an existing Checklist item is setup. If you're not already on the Checklist item page you can get there by following these steps:
- Choose Setup from the menu.
- Expand Checklist Items.
- Click the link for an existing Checklist item or the Add a New Checklist Item link.
This help topic will walk through the options found on the Checklist item set up page. You can find each of these described below.
Item Name
Enter the name of the Checklist item here. Examples of Checklist items names include Orientation, Application approved, Health screening, Confidentiality statement, Background check, and so forth. Checklist item names may be up to 30 characters long.
Must Volunteers Complete Another Checklist Item Before This Item Applies?
This option makes it possible for you to setup Checklist items that apply only after volunteers complete a different Checklist item. For example, if you want new volunteers to complete an evaluation 90 days after their initial orientation, you could setup a Checklist item called 90 day evaluation that volunteers must complete 90 days after they complete a Checklist item called Orientation. This prevents the 90 day evaluation item from appearing on a volunteer's Checklist until 90 days after they complete the Orientation item.
Select No if the Checklist item you're creating is not dependent upon volunteers completing a different Checklist item.
Select Yes if this Checklist item will not apply until sometime after volunteers perform a different Checklist item. If you select Yes, also enter the number of days that should pass before this item applies, and use the dropdown list to select the Checklist item that must be completed first.
How Often Must Volunteers Complete This Checklist Item?
One Time
Choose One time if this item is something volunteers only do once. Examples of things that typically happen just once include having the application form approved, background checks completed, name badges issued, or attending an orientation.
Once a volunteer completes a one time Checklist item, and you mark it complete in their record, the item will show as completed forever on their Checklist (unless you later delete the completed entry for this item from the volunteer's History tab).
Periodic
Choose Periodic if this item is something volunteers must repeat on a regular cycle. Examples of periodic Checklist items include health screenings volunteers must complete every 12 months and re-certifications required every two years.
When you choose this option, you'll need to indicate how often volunteers will need to complete this item. You'll enter the number of days that must pass before the item is due again. For example, enter 365 days if it's due once a year. And you'll choose whether these days are counted from the date it last expired or from the date it was last performed.
Choose to count from the date it last expired if the next due date for the item should be based on the last time this Checklist item expired for the volunteer. Choose to count from the date it was last performed if you want the item to be due again based on the last time the volunteer actually completed the Checklist item. The difference between these two options is only significant when volunteers do not complete the item as scheduled. For example, if a TB test is setup to expire once a year (every 365 days), but a volunteer does not repeat an Expired TB Test until two months after it was due, do you want that volunteer to be due again in just ten months (365 days after it last expired), or in another year (365 days after it was last performed)?
Once you mark a volunteer as having completed a periodic Checklist item, the item will appear as completed on their Checklist, and the date the item will be due again will appear next to the item in parentheses. When that date arrives the item will appear as due again in the volunteer's Checklist.
Annual (Same Date for All Volunteers)
Choose Annual (same date for all volunteers) if this item is something volunteers must do once a year, and it comes due in the same month or on the same day every year for all volunteers. Examples of things that would be annual (same date for all volunteers) might include membership payments due in January every year, or life safety re-certification performed in May every year.
If you choose this option, use the dropdown list to select the month and day the item comes due each year. Also specify if volunteers are allowed to complete the item early or not.
Annual (Volunteer’s Birthday Month)
Choose Annual (volunteer's birthday month) if this item is something volunteers must do once each year, and it comes due on a certain date in the month of the volunteer's birthday. An example of an item that might be due for volunteers in the month of their birthday is a health screening requirement.
If you choose this option, use the dropdown list to select the date the item comes due in the month of the volunteer's birthday. For example, if you select this option and choose the 15th as the expiration date, a volunteer whose birthday is in June would be due for the screening on June 15 each year, while a volunteer with a September birthday would not be due for it until September 15 each year. Also specify if volunteers are allowed to complete the item early or not.
Note that if a volunteer does not have a date of birth recorded on their Profile tab but the item is setup to apply to them, the item will always appear to be pending for them, since there is no way for the system to know which month the item is truly due. In order to mark this type of item complete by checking the box next to it on the volunteer's History tab, you will need to first enter a date of birth for the volunteer. You can, however, make the item appear complete without entering a birth date if you add a Checklist date for the item in the Dates box on the History tab instead of marking the box next to the item in the Checklist box on the History tab.
Annual (Start Date Anniversary)
Choose Annual (start date anniversary) if this item is something volunteers must do once each year, and you would like it to come due on the anniversary of the volunteer's start date. Annual evaluations are an example of an item that might be due for volunteers on each anniversary of their start date.
If you create a Checklist item with this rule and you mark the item complete for a volunteer who does not have a start date, their expiration date will be calculated as one year from the current date.
Volunteers may/may not complete this item early
When you choose one of the Annual options, you will need to indicate whether volunteers may (or may not) be marked as having completed the item early. When you setup an annual checklist item so volunteers may complete the item early, the item will appear on the checklist with a Renewed link, as shown here.
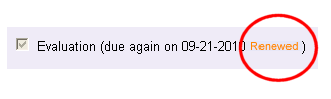
Clicking this Renewed link will mark the item complete for another year. When volunteers are allowed to complete the item early you can click the Renewed link before the item's expiration date has actually arrived.
When you setup an annual checklist item so volunteers may not complete the item early, the item will not include the Renewed link, and the item cannot be marked completed again until the next expiration date has arrived. Once the expiration date has arrived, the item will automatically appear unchecked (meaning that it is now due), as shown here.
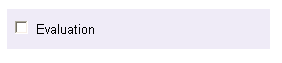
In this case, checking the checkbox will mark the item complete, as usual.
Which option you choose will depend on your policy for a particular checklist item. If it is okay that volunteers complete the item annually before the next expiration date arrives, choose may. If you do not want to allow volunteers to complete the item again until a full year has past then choose may not.
Here's an example. Suppose you require an annual performance evaluation for volunteers, and you want to be certain that at least one full year has passed since the volunteer's last evaluation. In this case you would setup the checklist item so that volunteers may not complete the item early. On the other hand, you might have an annual health screening requirement that you would like volunteers to perform no less than once a year (you would like them to complete it before it expires each year). In this case you should setup the item so that volunteers may complete it early each year.
Upon Expiration
Choose Upon expiration for items that have arbitrary future expiration dates, such as driver's license or medical license expiration dates. If you choose this option, you will need to manually enter the next expiration date for the Checklist item when you mark it as complete. The item will appear as pending when that date arrives.
Every Time
This option appears disabled unless this Checklist item applies only after a volunteer completes a different Checklist item (see Must volunteers complete another checklist item before this item applies? above).
Choose Every time if this Checklist item must be performed each time a volunteer completes the pre-requisite Checklist item.
Never
You should only choose the Never option if the Checklist item you're working with is no longer required for any volunteers to complete. An example of when you might use this option is if you have a Checklist item that was formerly a requirement for volunteers and you'd like to keep the historical information for that item. If you delete a Checklist item, any dates for that Checklist item would be deleted as well. Choosing the Never option lets you keep that information in your database without the item showing as due.
Which Volunteers Should This Item Apply To?
A Checklist item may apply to all volunteers, or just certain volunteers. For example, a Checklist item such as Orientation might apply to all volunteers, however an item like Parental consent form might only apply to volunteers under the age of 18. Use this section to specify which volunteers this Checklist item is required of.
If your new Checklist item applies to all volunteers, then all volunteers in your database (and any new volunteers you add) will automatically have this item listed on their Checklist.
If your new Checklist item applies only to certain volunteers, then only those volunteers will have this item listed in their Checklist. Volunteers for whom this item does not currently apply will not have this item listed on their Checklist. If, however, their record changes so that they meet the criteria for this item, it will automatically be added to their Checklist at that time. For example, if you create a Checklist item called Drivers license check that applies only to volunteers who have an Assignment that involves driving a vehicle, Drivers license check will not appear on the Checklist for a volunteer who is not assigned to one of these Assignments. However if that volunteer is later assigned to an Assignment that involves driving a vehicle, the Drivers license check will automatically appear on their Checklist as soon as they're assigned.
Below is a breakdown of the settings you can use to configure which volunteers a Checklist item should apply to.
If Their Status Is
Check the boxes for the statuses volunteers must have in order for this Checklist item to apply to them. This item will not appear on a volunteer's Checklist unless their status is one of those you choose here.
Generally, Checklist items would not need to apply to volunteers with a status of Inactive or Prospect.
If Their Kind Is
If you track both Individual and Group volunteers, use this control to specify which kinds of volunteers this Checklist item will apply to.
Select Either individual or group if you want the Checklist item to apply to both individuals and groups.
Select Individuals only if you want the Checklist item to only apply to individuals.
Select Groups only if you want the Checklist item to only apply to groups.
Keep in mind that Group records (if you use them) represent groups of volunteers who you do not track individually. For this reason there is not a way to use Checklist items to track whether or not specific members of a group have completed a requirement. If you setup a Checklist item that applies to Groups, you can use the Checklist in each Group record to show whether or not the group contact completed that item. If you want to track Checklist items for individual members of a group, you will need to create individual volunteer records for the group members.
If Their Type Is/Is Not
Check this option if you want this Checklist item to apply only to volunteers of (or not of) a specific Type.
The Type field appears in the Name box on the Core tab, and it is typically used for classifying volunteers by major program type, such as adult, junior, student, regular, occasional, auxiliary, and so forth.
If you check this option, choose Is if this Checklist item should apply only to volunteers who have a specific Type. Choose Is not if this Checklist item should apply only to volunteers who do not have a specific Type. Then choose the appropriate Type from the dropdown list.
For example, a Checklist item called Parental consent form might apply only to volunteers if their Type is Junior. In this case you would choose Is and then select Junior from the dropdown list. In this example, Parental consent form would not appear on a volunteer's Checklist unless their Type was Junior.
If Their Flag Is/Is Not
Check this option if you want this Checklist item to apply only to volunteers who have (or do not have) a specific Flag in their record.
Flags appear in the Flag box on the Core tab for each volunteer. Flags are typically used to classify volunteers into different groups, such as board of directors, donor, sponsor, day of caring, red team, and so forth.
If you check this option, choose Is if this Checklist item should apply only to volunteers who have a specific Flag. Choose Is not if this item should apply only to volunteers who do not have a specific Flag. Then choose the appropriate Flag from the dropdown list.
For example, a Checklist item called Membership payment might apply only to volunteers who have a Member Flag in their record. In this case you would select Is and then choose Member from the dropdown list. In this example, Membership payment would not appear on a volunteer's Checklist unless they had the Member Flag in their record and were due for a membership payment.
If They Are in This Set
Choose this option, and select a Set from the dropdown list if you want this Checklist item to apply only to the volunteers who are in the selected Set. For example, if you want a Checklist Item to apply only to volunteers who have served for more than 12 months you can create a Set that includes just these volunteers and then use that Set as the basis for the Checklist item.
The Set dropdown list you see here will not include any Sets that have a Set Rule based on Their checklist. If you do not see a specific Set on this dropdown list it is because it includes this kind of rule (Checklist criteria cannot include Sets that themselves reference the Checklist to prevent "circular references"). If you would like a particular Checklist item to apply only when another Checklist item has been completed, choose Yes under Must volunteers complete another checklist item before this item applies at the top of the Checklist item setup page.
Those That Have Any Assignment With
Some Checklist items might only apply to volunteers who have a specific kind of volunteer Assignment. For instance, a Drivers license check might apply only to volunteers if they have an Assignment that includes driving a vehicle; and a TB test might apply only to volunteers who have an Assignment that would involve patient contact.
You can use this section to indicate what kinds of Assignments a volunteer must have in order for this item to apply. There are more detailed instructions on how to configure these Checklist items in Make Checklist Items Apply to Only Certain Assignments.
Skip this section if this item applies no matter what Assignment(s) a volunteer has.
Those Assigned To
Some Checklist items might only apply to volunteers who have a specific Assignment, Assignments under a certain Place, or Assignments under a particular Site. For instance, an item called Counselor certification checked might only apply to volunteers who have the Assignment Patient family counselor.
If this item should only apply to volunteers that have a specific Assignment, or Assignments in particular Place, or Assignments in a certain Site, use the dropdown list to select the Site, Place, or Assignment and then check the role(s) volunteers must have in the selected Assignment (or Site and Place's Assignments) before this item will apply.
Skip this section if this item applies no matter what Assignment(s) a volunteer has.
Email Reminders
You can optionally choose to have Volgistics send automatic reminder messages to volunteers when they are coming due or are past due for a Checklist item. You can set up these reminders for Checklist items that are configured with the following options:
- Periodic
- Annual (same date for all volunteers)
- Annual (volunteer's birthday month)
- Annual (start date anniversary)
- Upon expiration
You can configure these reminders in the Email/Text Message Reminders box.
You can choose to send up to three reminders for each Checklist item. For example, you might choose to send one reminder 30 days before it expires; a second reminder seven days before it expires, and a final reminder one day after it expires.
Each of the reminders you configure for your Checklist item can be customized with rich text formatting to help add clarity and emphasis to your messages.
Note that if you choose to send reminders for items configured with the Annual (volunteer's birthday month) option, the volunteer will need to have a date of birth recorded on their Profile tab. If they do not have a date of birth recorded, the system cannot know when to send the reminder. The only exception is if a Checklist date containing an expiration date for the item has been added to the Dates box on the History tab (as described above, under Annual (volunteer's birthday month)). In this case, a reminder email can be generated without a date of birth entry; since an expiration date for the item has been entered, the system can determine when a reminder should be sent.
Click the Save button to save your Checklist item setup, or the Cancel button to close the page without saving your changes.
Use Sets with Checklist Items
Related Help
- Background Screening With Verified First
- Checklist Expiration Date Calculation
- Track Vaccine Compliance
- Checklist Overview
- Make Checklist Items Apply to Only Certain Assignments
- Mark Checklist Items Complete
- View a Volunteer's Checklist Items
- Find Volunteers Due for a Checklist Item
- Track TB Test Requirements
- Delete a Checklist Item
- Combine Checklist Items
- Volunteer List Report - Volunteer Checklist Report (stock)