Add Assignment Descriptions to Applications
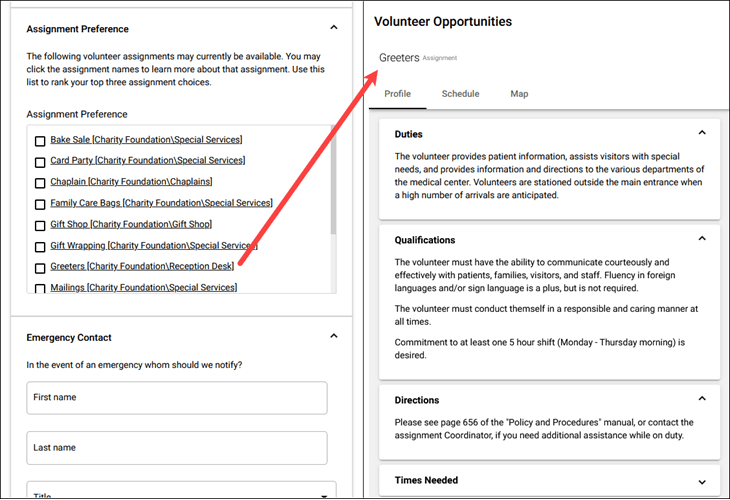
When recruiting new volunteers, you may want them to choose which Assignments they would like to serve in. You can collect this kind of information by adding an Assignment Preference field to your online application forms. However, it may also be beneficial for you to provide these new volunteers with more detailed descriptions of each Assignment so they can make a more informed decision about their preferences. With the online application forms feature, you can share descriptions of your Assignments by linking to Assignment profiles right on the application form.
Add Descriptions to your Assignments
You'll need to add descriptions and other information that you want applicants to see for each of your Assignment records. Assignment profiles can include information from the Assignment, Profile, and Description tabs of your Assignment records, and you'll be able to choose which information from these tabs will be included (as explained in the next section).
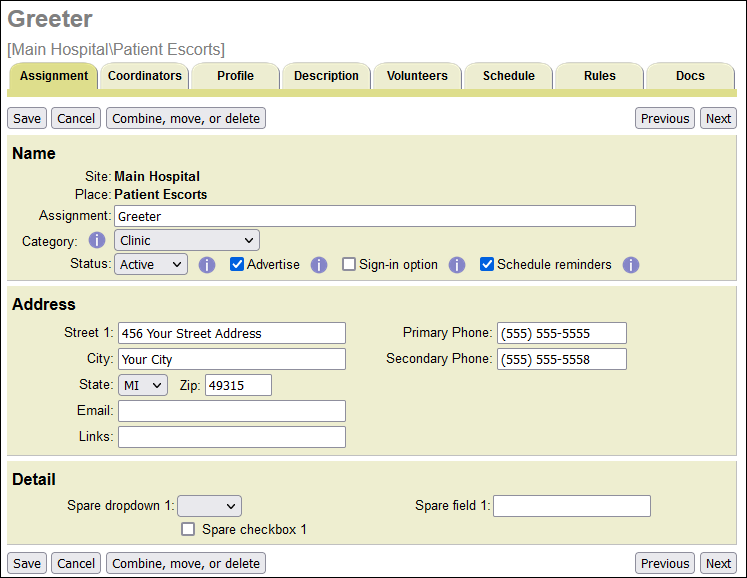
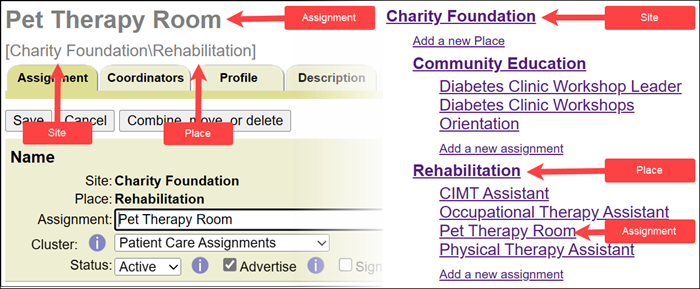
The Assignment tab includes more general information about the Assignment, like its name and location. The Opportunity Directory that displays the Assignment descriptions can include a map of the Assignment's location. If you want the map to appear, you will need to enter a complete address on the Assignment's main tab.
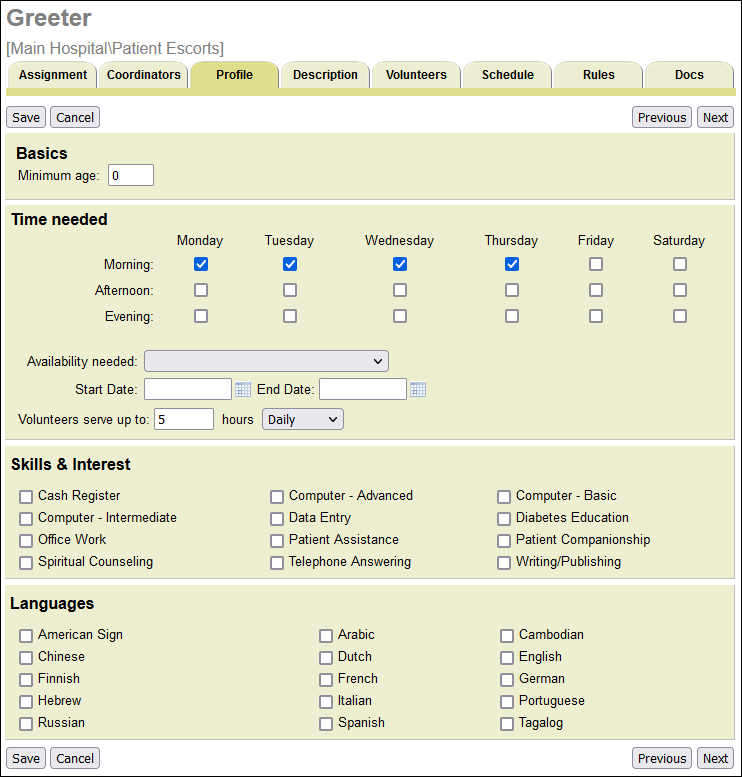
The Profile tab includes more specific information about the Assignment, such as age requirements, required skills, and times you'll generally need volunteers to serve.
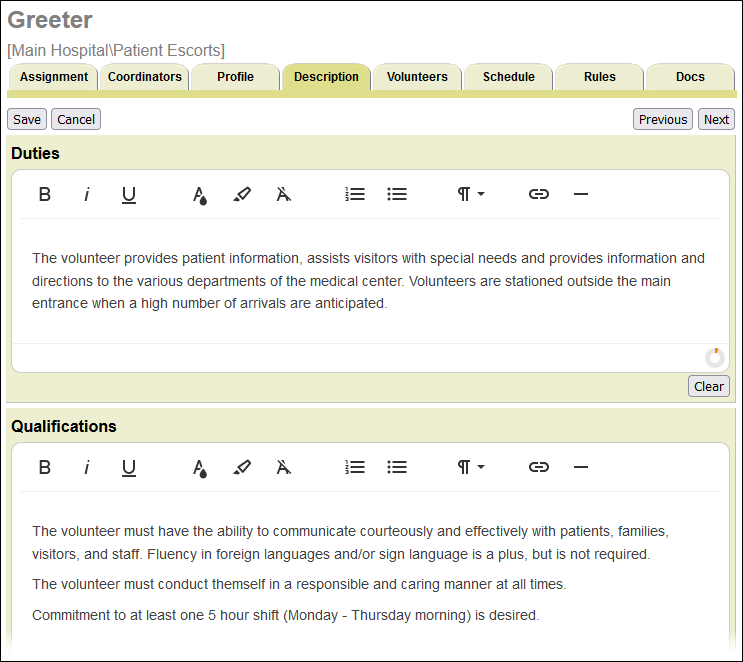
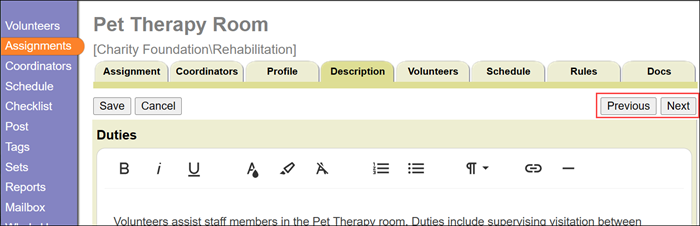
The Description tab allows you to add long-form or narrative information about the Assignment. This is a great place to provide a summary of the expectations, qualifications, and duties associated with the Assignment. The fields on this tab utilize a rich text editor that can be used to add custom formatting to the content you enter. Use these formatting options to organize, emphasize, and clarify your content.
To access an Assignment record and modify the content on these tabs:
- Choose Assignments from the menu.
- Click the link for the Assignment you'd like to add information to.
- Select the tab you'd like to modify.
- Add information to the fields you'd like.
- Click the Save button before proceeding to another tab or Assignment record.
You can repeat these steps for each Assignment you'd like to include a profile for.
Tip!
As you work on adding information to your Assignment records, you do not need to select Assignments from the menu to go to the next Assignment. You can use the Next and Previous buttons to navigate through your Assignments instead. These buttons appear at the top and bottom of your Assignment records.
If you have more than one Site or Place record, the Site and Place names at the top can help you keep track of where the Assignment is located in your Site, Place, and Assignment hierarchy.
Choose Which Information to Include in Assignment Profiles
Now that you have updated your Assignment records with this information, you can customize which fields and information will actually be included in the Assignment profiles that applicants see. The Opportunity Directory feature allows you to share Assignment profiles publicly, so you will use these settings to configure which information is included in your Assignment profiles. Please keep in mind that updating the choices for the application forms will also change what is shown in the Opportunity Directory itself if it is linked to your organization's website. There is not a way to have the Assignment links on the application forms have different field choices than the Assignment links on the Opportunity Directory.
Here are the steps to select which fields are in the profile:
- Choose Setup from the menu.
- Expand the Opportunity Directory link.
- Click on Ground Rules.
-
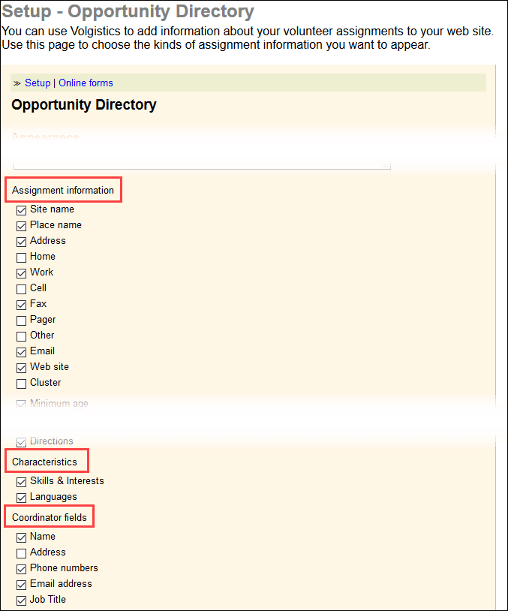
In the Assignment information, Characteristics, and Coordinator fields sections, check the boxes for the fields you'd like to be included in each Assignment profile.
-
Click the Save button.
Enable Assignment Links on your Application
Lastly, you can set up your application form to display Assignment names as links to Assignment profiles, and you can add your Assignment Preference field to the form if it hasn't been added already. To set up the application forms to display Assignment names as links:
- Choose Setup from the menu.
- Expand Application Forms.
- Select the form you'd like to update.
- Check Link Assignments, Places, and Sites to Opportunity Directory descriptions.
-
Click the Save button.

If you still need to add the Assignment Preference field to the form, click the Customize Form Content link. For help adding the field, see the Add & Organize Fields section of Customize Application Form Content. If you'd like to add a new form section for the field, see the information under Add & Manage Form Sections.
Tip!
The Assignment Preference field can also be added to the VicNet portal so volunteers and Coordinators can view or update it after they apply. See VicNet Profile and Volunteers Page Setup for information about adding the field there.